ps中磨皮祛痘的方法步骤及教程
拍照时光线、角度、表情神马的都很好,可是脸上长了好多痘痘,难道不要这些照片吗?这怎么行,快找PhotoShop来帮忙!脸上长痘痘的MM不用再担心了,绿茶小编今天为你们带来了PS磨皮去痘教程,快来看看吧!
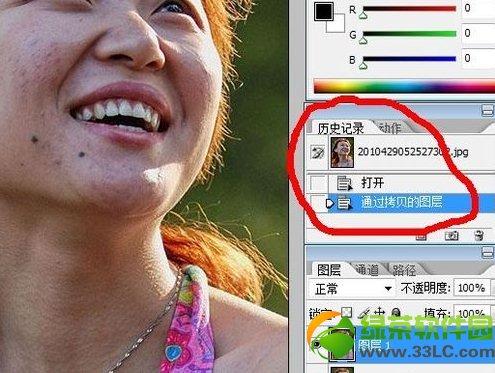
PS磨皮去痘第一步、
把原图拉进PhotoShop里面,按Ctrl + J【复制一层】。
PS磨皮去痘第二步、
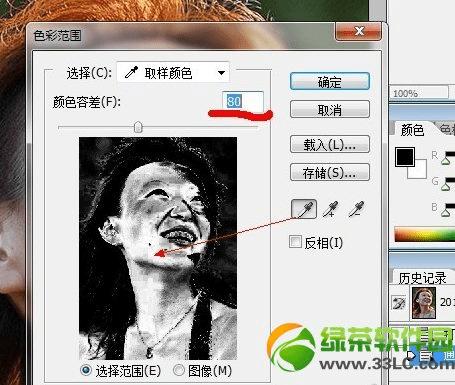
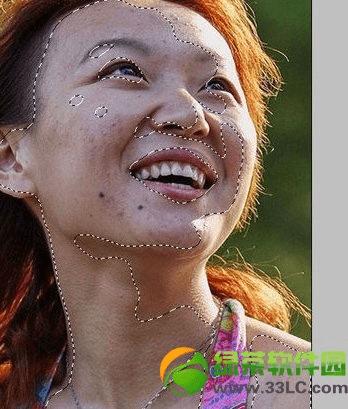
选择图层 1 ,按“选择”----“色彩范围”(和魔术棒效果差不多,都是选择相同色泽的选区)。
图中白色块则是被选中的范围,灰色的则是被选中部分,黑色部分则是不选择的部分!容差值自选(数值越大,所选的色泽范围越大,适合即可)。
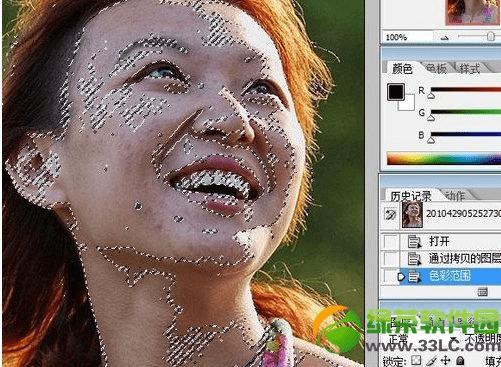
效果如下图。
PS磨皮去痘第三步、
在完成第二步后,选区中会有很多锯齿(放大图才看到的),所以再按“Ctrl + Alt + D”(羽化一下选区来选择一下大概的选区)。
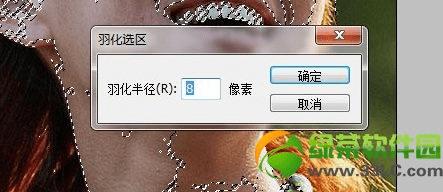
羽化后效果如下图。
PS磨皮去痘第四步、
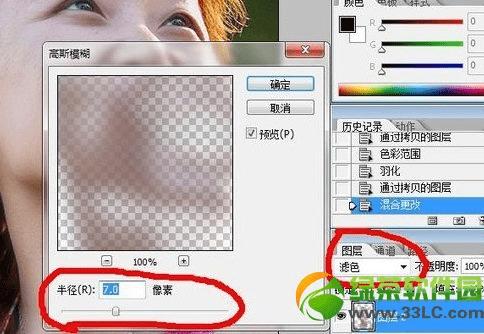
按“Ctrl + J ”(复制一层被选中的选区),再选择图层 2 ,把混合模式改为“滤色”。
按“滤镜”----“模糊”----“高斯模糊”(自己可以拉动下面的游标看图像显示出来的效果而自行设定)。
痘痘没那么多的话和没那么多要求的话,可以省略下面步骤!
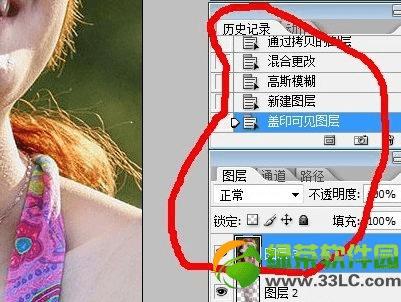
PS磨皮去痘第五步、
新建一图层,按“Ctrl+Shift+Alt+E”(盖印一下可见的图层)。
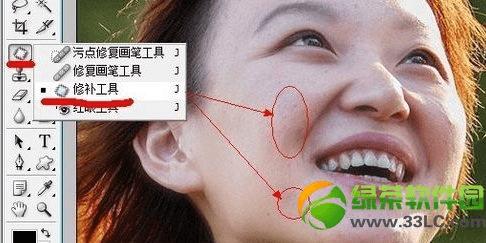
PS磨皮去痘第六步、
使用修复画笔工具,把那两颗可恨的黑痣去掉吧!
按住Alt + 鼠标点击黑痣旁边漂亮可用的皮肤,再放开Alt 键,对黑痣单击鼠标一下,就把它消灭掉啦!(痘痘严重处,可以自行再度使用修复画笔工具消灭痘痘)

选择“修复画笔”。
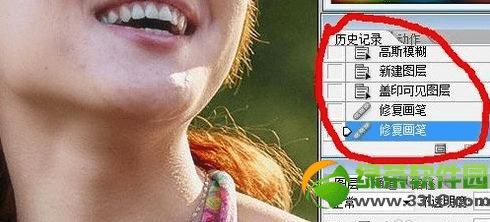
修复效果如下图。
PS磨皮去痘第七步、
再使用修补工具,把因痘痘而出来的暗红色块消灭掉!用鼠标把暗红色块处圈出来,再对被选中的暗红色块拉去到旁边可用漂亮的皮肤处来修补(PS自动计算修补)。按Ctrl + D (取消被选择中的选区)。
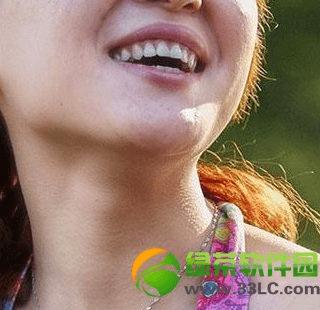
怎么样?效果很好吧!
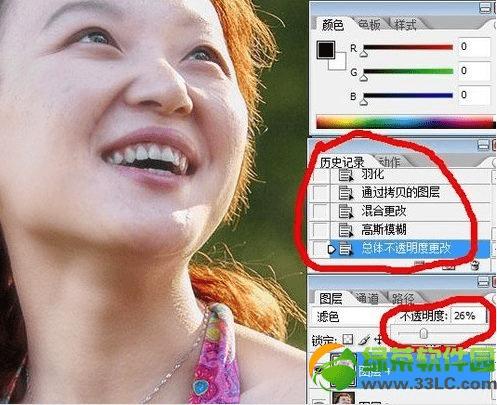
重复步骤二、三、四(进一步美白皮肤),最后会看到图太白了,所以还要把该图层的透明度调节一下(适当调节)。完成收工~
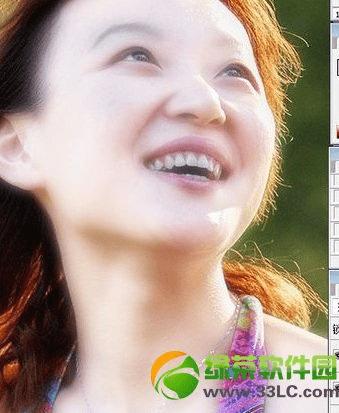
调解后效果如下图。
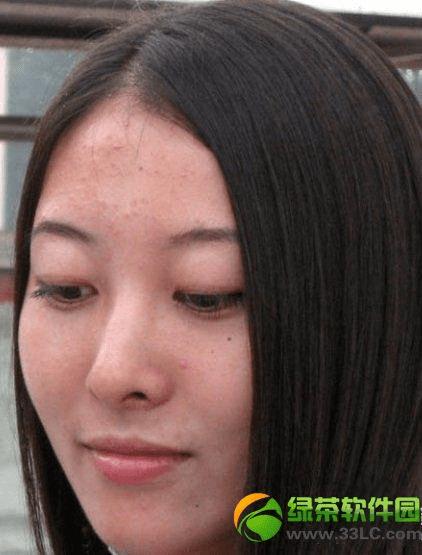
再发张效果图!
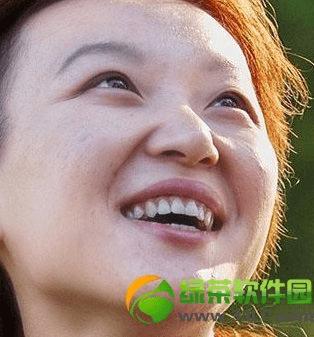
磨皮前
磨皮后
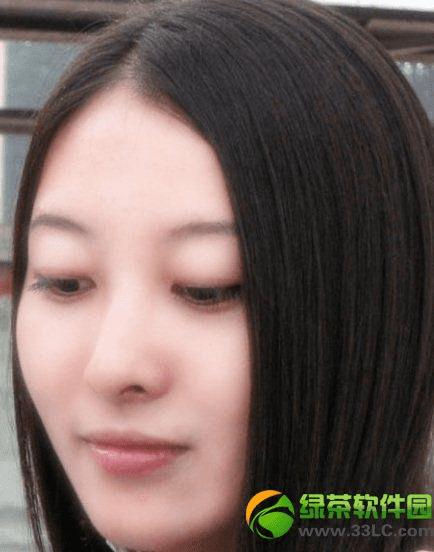
哇~效果真的是很赞啊!各位MM一定要掌握啊,以后痘痘神马的都是浮云了!
本文地址:http://www.45fan.com/dnjc/16464.html