在PS中绘制色彩缤纷的可爱立体字效果的技巧
这篇教程是向路饭的朋友介绍PS绘制一款色彩缤纷的可爱立体字效果方法,这篇教程很不错,很值得学习,主要是考察同学们对钢笔工具的使用和渐变色彩的敏感度,拿来练手加强基础非常合适,而且完成效果也非常漂亮,素材已经打包好,马克后记得学。
先来张最终效果图:

热身练习
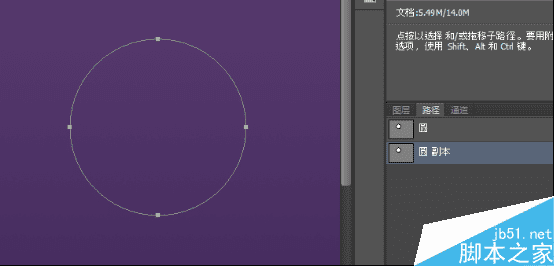
1. 使用椭圆工具,选择路径选项,按住Shift键,画一个圆形,直径320px。
2. 选择画笔工具,调出画笔面板(F5),设置参数。
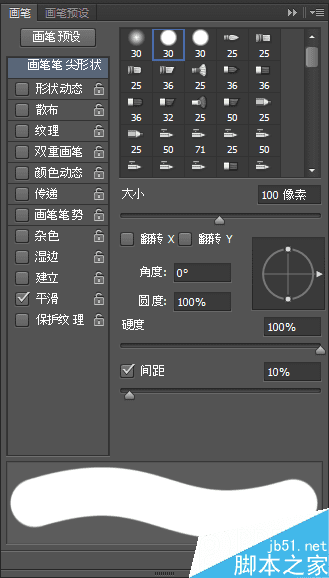
新建一个图层,保持画笔工具选中的状态,按Alt+Enter,描边填充成功。

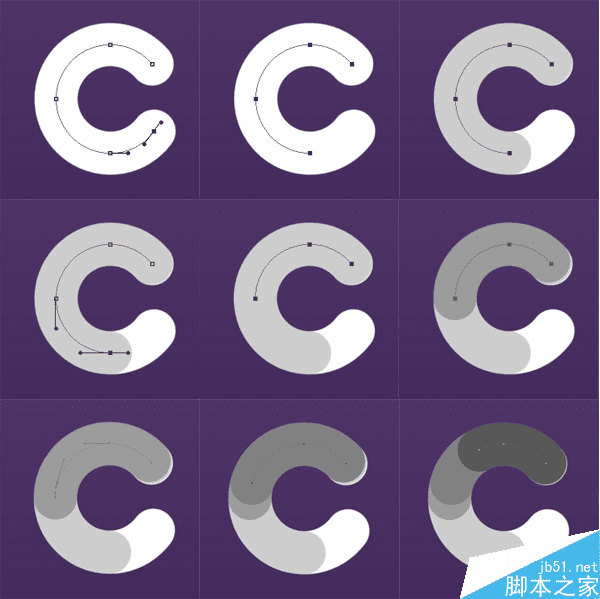
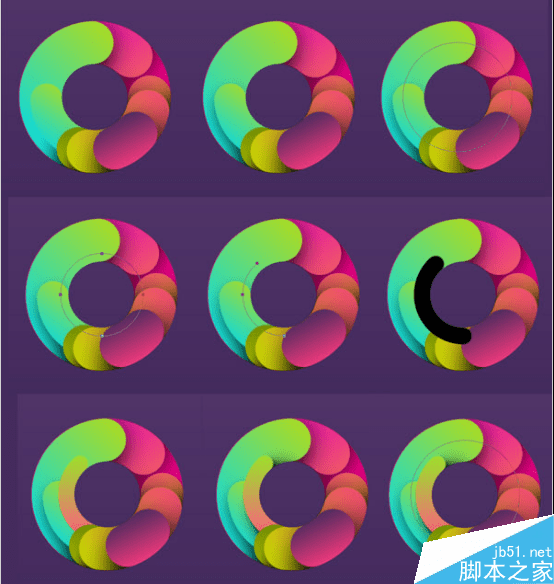
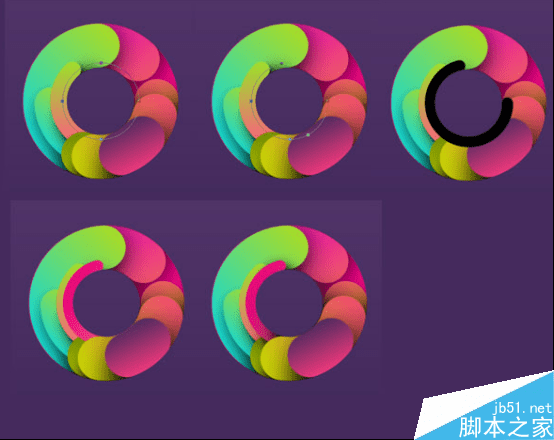
3. 选择直接选择工具(A),点击两个锚点之间的路径,删除。然后新建一个图层,用深一点的颜色填充这个路径。
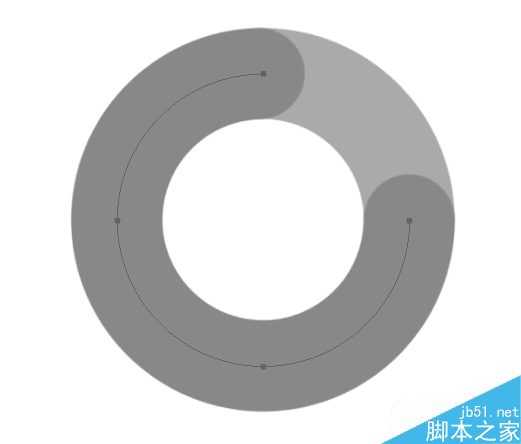
4. 选择钢笔工具(P),在路径上加两个锚点,如图所示。
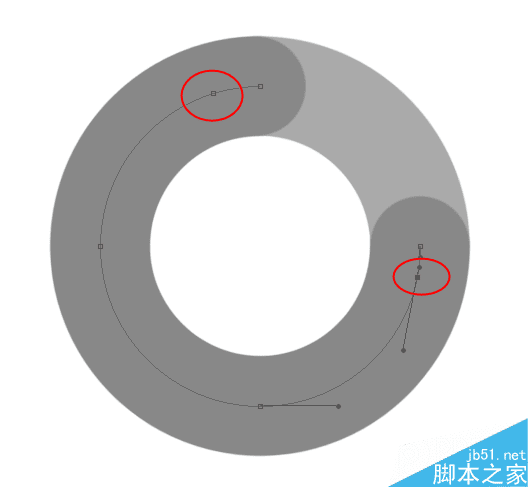
使用直接选择工具删掉路径两端的两个锚点,然后新建一个图层,使用更深的颜色填充描边,效果如下。

5. 按照如上的步骤,继续添加锚点-删除锚点-填充描边,达到如下效果。

正式开始
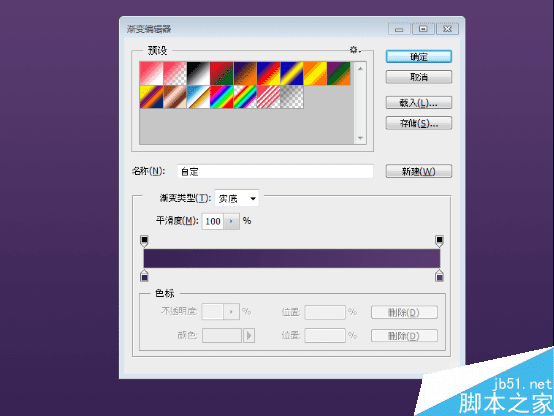
1. 新建一个图层1600*1200px,背景设置为#392354 - #593b70的渐变。
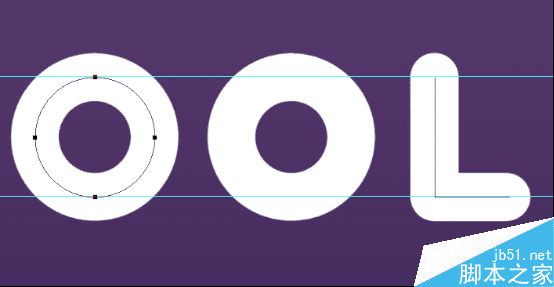
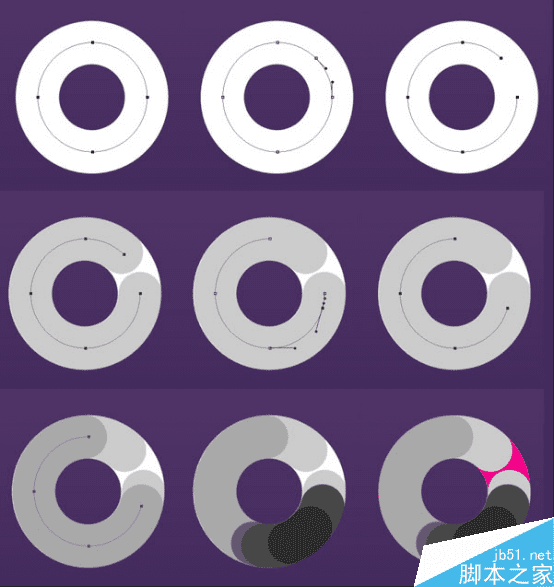
使用椭圆工具画一个圆,200px,去到路径面板复制这个路径。
然后我们要做一个字母C,使用钢笔工具在路径“圆副本”上加两个锚点,然后删除亮点之间的路径,如下。

使用大小80px的画笔,新建图层填充这个路径,如下。

选择路径“圆”,复制并向右平移,就成为了一个字母“O”。

新建图层,填充描边。

复制这个字母“O”。

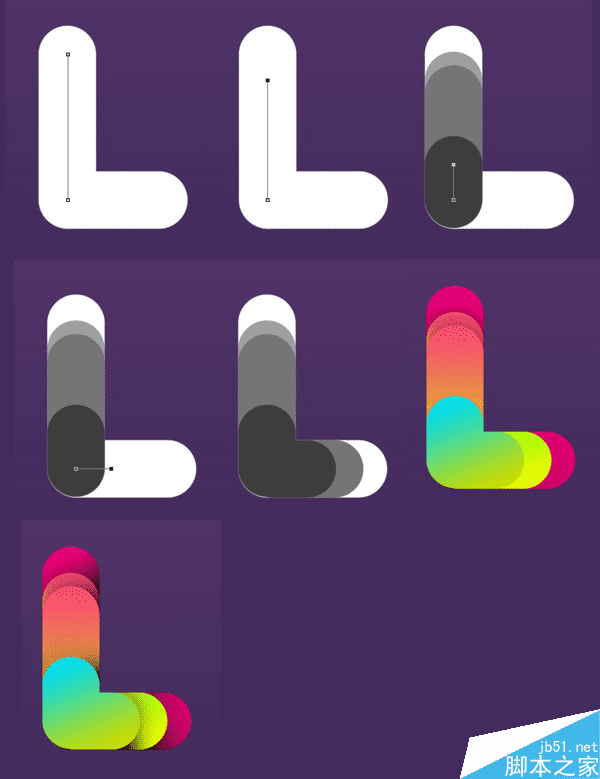
然后来画字母“L”,注意高度要和圆的直径一样。
2. 接下来就是处理每个字母,步骤参考准备工作。要注意别忘记新建图层再给路径填充描边。处理路径的时候,别忘记复制一个,因为之后还会用到原来的路径。

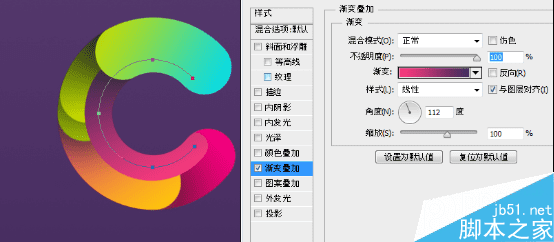
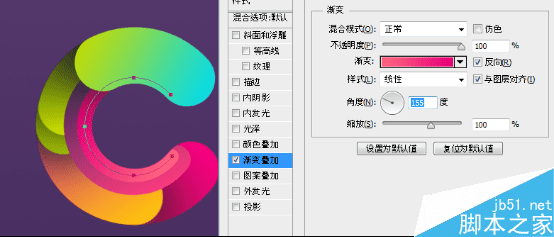
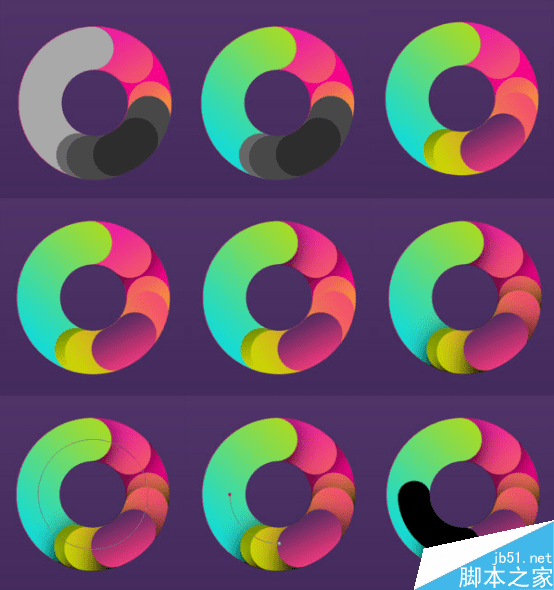
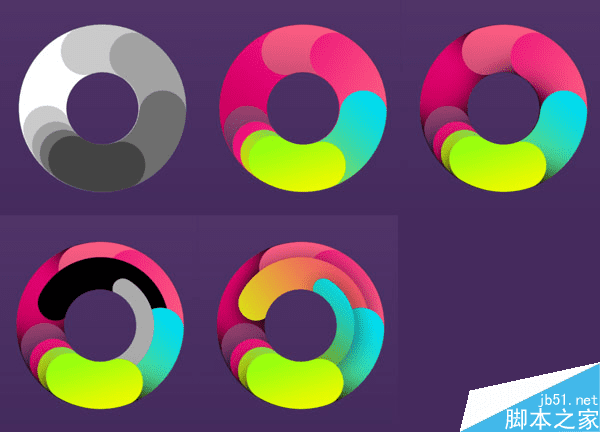
然后添加颜色。选“C”图层,添加图层样式,渐变色值为#ff0096 - #c20049。
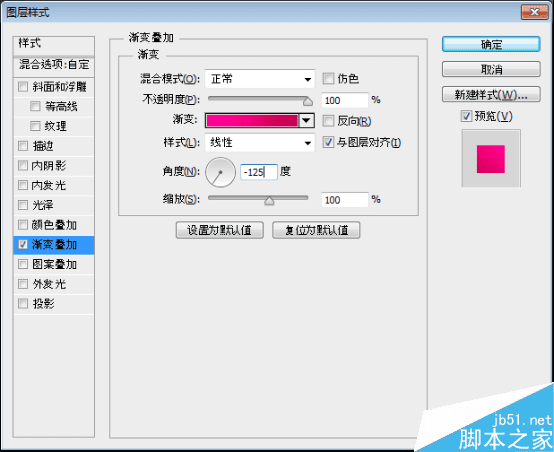

然后依次给每个图层添加效果。色值从图层2开始分别为:
图层2:#ffd200 - #e900ba

图层3:#4a6d00 - #b1d603
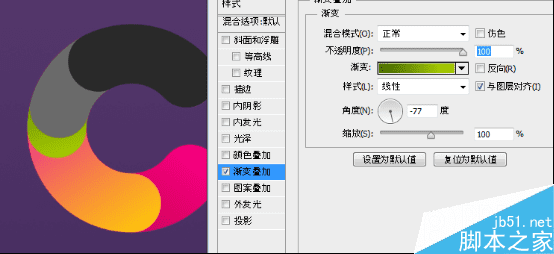
图层4:#4a6d00 - #eaf900
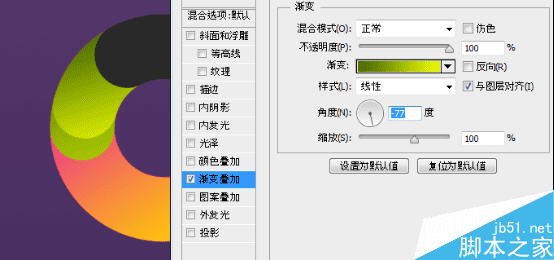
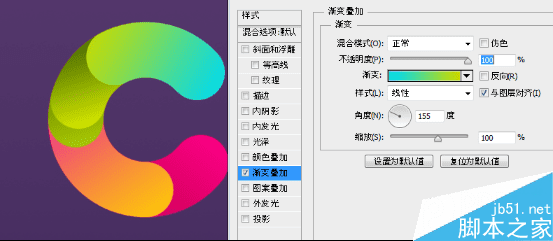
图层5:#00dbef - #c8db00
分别在图层2、3、4、5下新建一个图层,用柔软黑色笔刷加上投影效果,不透明度为50%。

选择字母C的路径,稍微缩小点,新建图层,使用40px的笔刷填充路径。添加渐变效果,色值为#fb3a7e - #442b5d,然后置于上面数第二层。

继续缩小这个路径,然后新建图层-填充描边-添加渐变(色值为#e80079 - #ff6481),画笔大小为20px。
然后将第一个缩小的图形置于上面数第二个正常图层下方,然后给两个缩小的图形分别添加投影。

这样字母C就做好了,还有三个字母,加油吧!
3. 你可以按照教程里的形状来做,也可以自己设计。使用和C一样的渐变色值,以便保持颜色的统一。
步骤同上,不再赘述。
这里作者很任性,他不喜欢最上方的那小半个圆,那就删掉吧。

接下来是第二个O。
接下来是最简单的L。
4. 终于完成四个字母了。下一步是用自由变换工具调整四个字母的位置和角度,如下图。

接下来给字母添加高光。添加较短的路径,填充15px的白色描边,再加一个白色圆点。

给其他字母添加高光,可以适当的调整部分高光为叠加,并降低不透明度,效果如下。
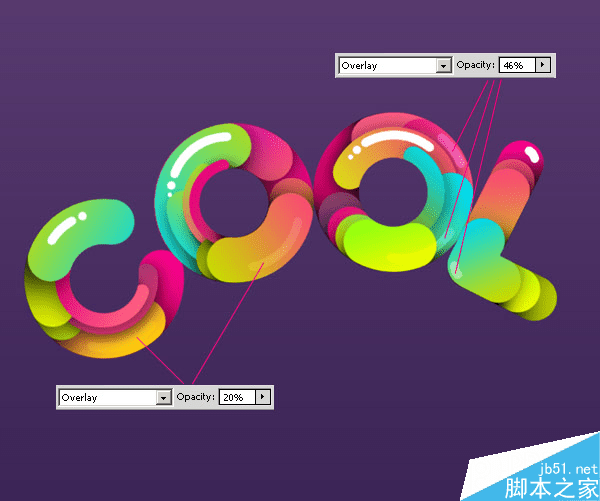
5. 在字母周围添加一些装饰性的线段,使用和文字一样的渐变。简便方法是选择想要的渐变图层,右键-拷贝图层样式,然后点击新图层,右键-粘贴图层样式。

6. 前景色设置为#754a9,选择多边形工具,选择形状(这次不是路径了),边为3,勾选平滑拐角,在文字周围添加些圆角三角形。
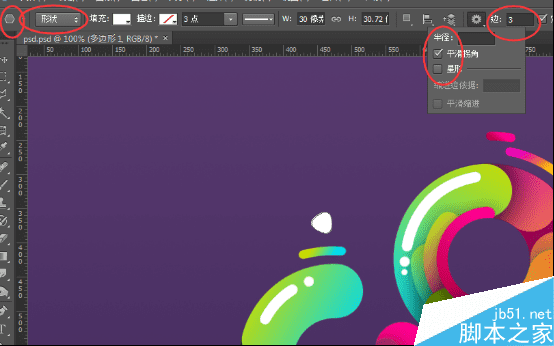

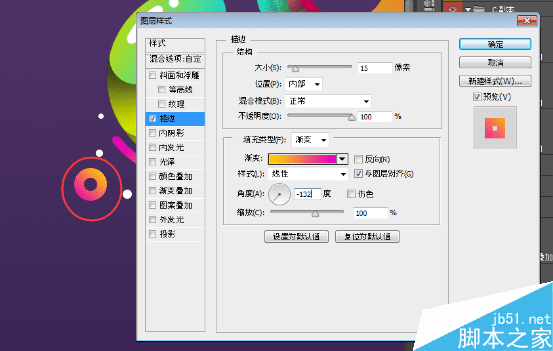
前景色改为白色,使用椭圆工具,在文字周围添加些大大小小的圆形。

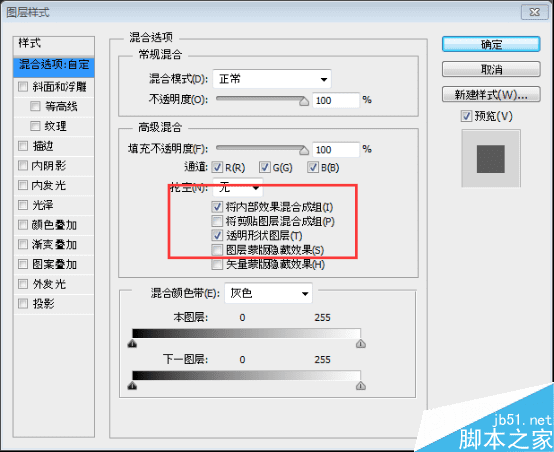
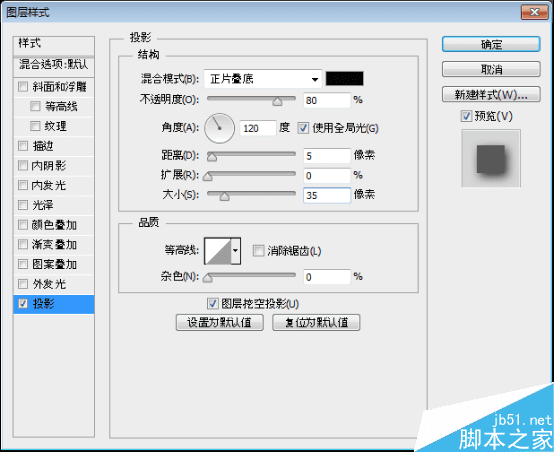
将这些圆,填充设置为0,应用如下图层样式。

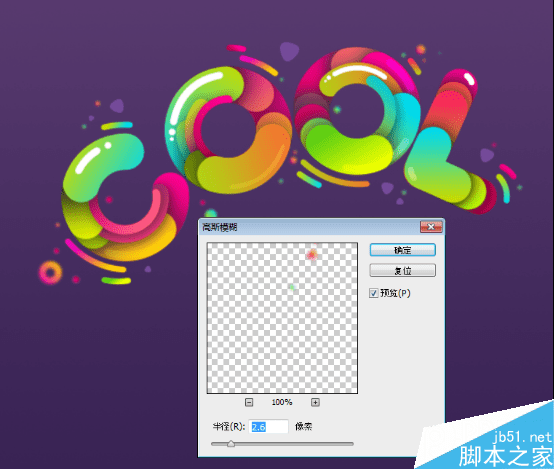
然后给这些圆添加2.6px的高斯模糊。
7. 接下来是背景。
在背景层上方新建一个图层,使用色值为#ff02ea的柔软的大笔刷,在文字下方涂一涂。

混合模式改为柔光。

使用小的黑色的柔软笔刷,给文字加上阴影效果。

混合模式改为柔光。

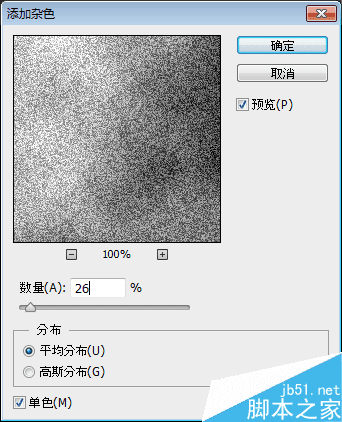
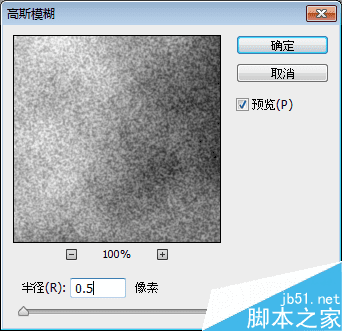
7. 在所有背景层的上方新建一个图层,按一下D,将背景色改为默认的黑白,①滤镜-渲染-云彩;②滤镜-杂色-添加杂色,如下图;③滤镜-模糊-高斯模糊,如图。然后混合模式改为颜色加深,不透明度为20%。

7. 选择矩形工具,画一个正方形,旋转45度。选择直接选择工具,按住Alt + Shift拖动鼠标,就平行复制一个新的正方形了。然后继续复制,达到如下效果。

7. 然后就添加一些点缀的花朵,并给它们添加投影,也可以稍微加点模糊效果。花朵素材:http://pan.baidu.com/s/1i4abXIl

7. 最后一步。在顶层新建一个图层,前景色为黑色,选择渐变工具,选择前景色到透明渐变,径向渐变,反向,然后从画布中心到边缘拉渐变,混合模式为柔光。


恭喜你,大功告成啦!
给坚持下来的你,鼓掌!!!
本文地址:http://www.45fan.com/dnjc/33469.html