37、展开这个“Glass lwr highlights + shadows” 组,并删除那些我们之前创建形状的“Glass upr highlights + shadows”组。因为它们是重叠的,我们仅需要形状上部。
38、创建一个名“Base upr + lwr”组在“Glass upr + lwr”层之上,在“Bg grd”之下 。使用椭圆和矩形工具,并适当变形,建立出如下形状。
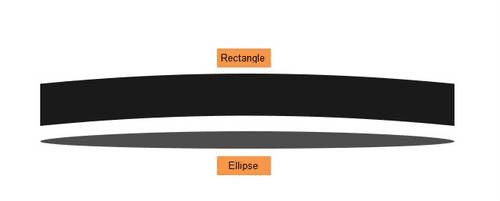
39、使用锚点工具和直接选择工具。如图所示,放在一起。形状图层的名称 “Base upr large surface” 和 “Base upr large side”。
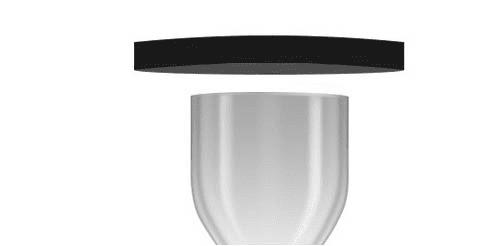
40、复制这两个层并重新命名他们“Base upr small surface” 和 “Base upr small side”. 。并调整其大小,如图放置。
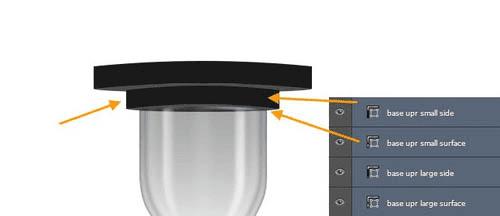
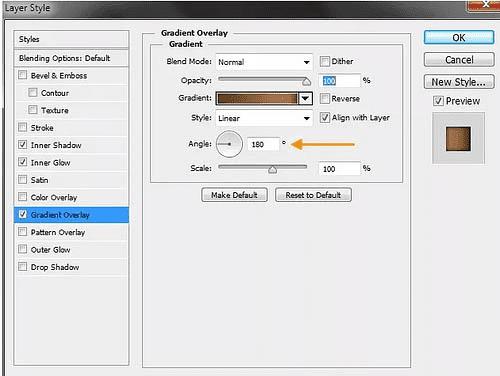
41、双击“Base upr large side”图层打开图层样式窗口。下面是渐变叠加设置。
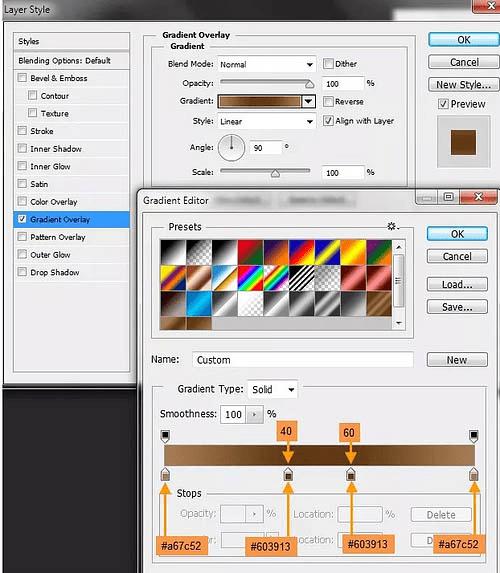
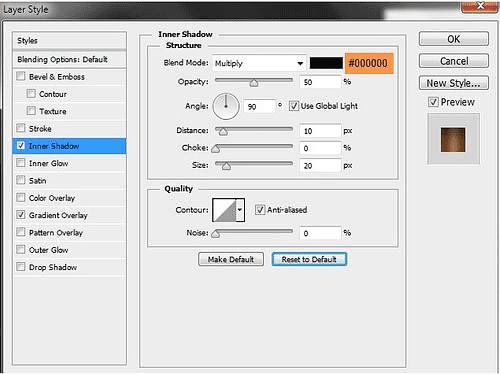
然后,内阴影设置:
42、“Base upr large surface” 图层样式。下面是渐变叠加设置:

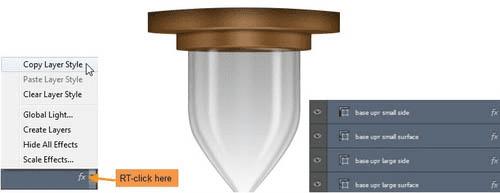
43、接下来,我们复制“Base upr large side”粘贴图层样式到“Base upr small side”。然后是“Base upr large surface” 到“Base upr small surface”。
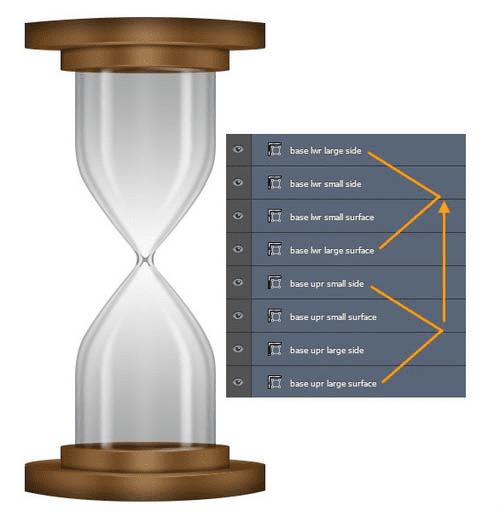
44、把所有的打包成组,然后ctrl+j复制,垂直翻转,重命名。
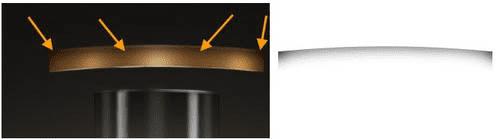
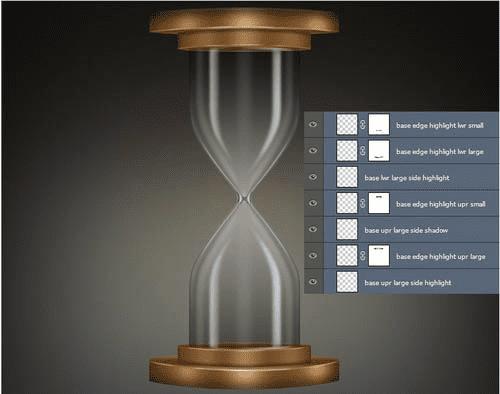
45、下一步,我们将创建高光和阴影,首先创建“Base lwr large side” 的高光,名称为 “Base upr large side highlight”图层。按住CTRL键单击以选中“Base upr large side”,选出选区,然后用软刷白色,50%的不透明度,如图在新图层上画,然后该层的不透明度变化至70%。

46、创建一个名为“Base edge highlight upr large”在之前的高光图层上,并创建相应大一些的亮点。

47、添加图层蒙版,用柔软的黑色笔刷与50%不透明度,隐藏某些地区。降低图层不透明度为50%。

48、创建一个新层,命名为 “Base upr large side shadow”,使用软刷黑色和50%。图层不透明度改为70%。
49、接下来创建一个名为 “Base edge highlight upr small” 层,画一些小的高光边。用软刷有白色的颜色。

50、添加图层蒙版和油漆,用柔软的黑色笔刷与50%的不透明度隐藏某些地区。降低图层不透明度为50%。

51、同样完成下半部的高光。不要阴影。
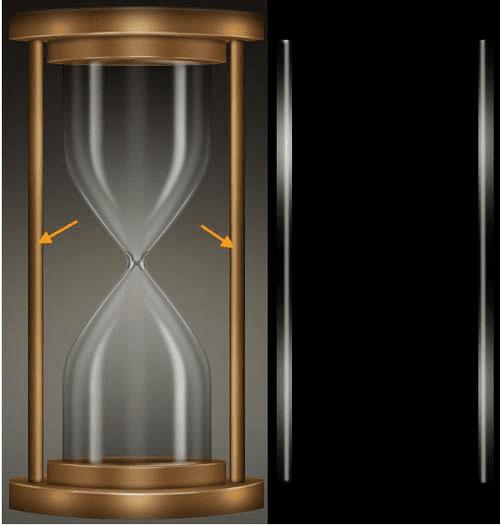
52、创建一个新的图层组“Stands” 在“Base upr + lwr”之上。然后创建两个新的矩形形状图层(#4c4c4c)。17px宽*491px高。 命名为“Stand left” 和 “stand right”。

53、双击“Stand left”层创建以下图层样式。首先渐变叠加。

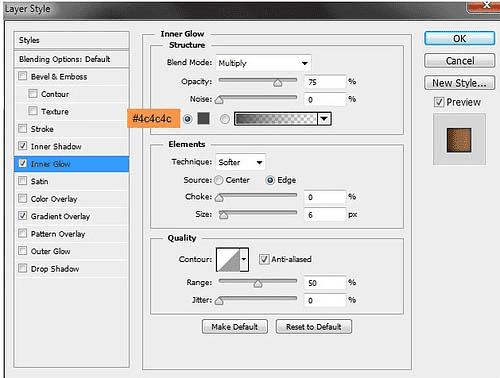
内发光设置:
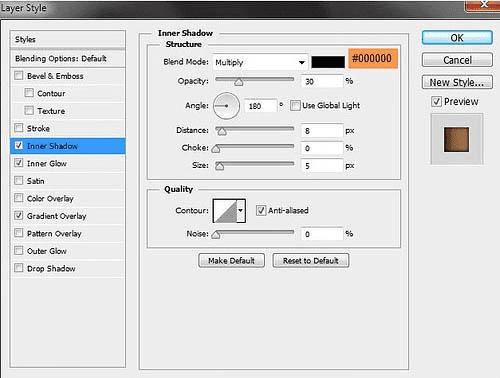
内阴影设置:
54、复制 “Stand left” 图层样式,粘贴到“Stand right”。只改变渐变叠加角。

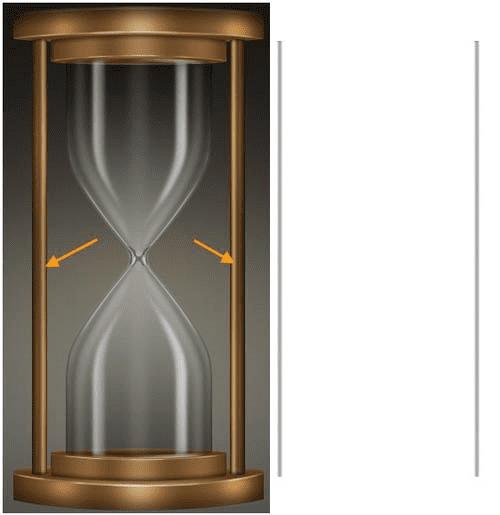
55、接下来是画两个柱状的高光,两个图层,名为“Stands left + right highlights”。选择柔软画笔,50%不透明度,白色。然后按住CTRL键单击以选中图层,然后画出如下效果。改变的不透明度到50%,混合模式为叠加。
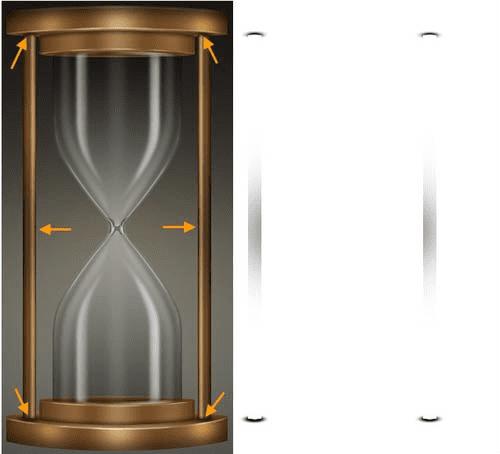
56、下面我们创建阴影,新建两个图层,名为“Stand shadows ver”,柔软黑色笔刷,50%透明度,图层透明度70%,混合模式为正片叠底。
57、创建第二个阴影层的名称“Stand shadows”在 “Stand shadows ver” 之上,同样的方法。
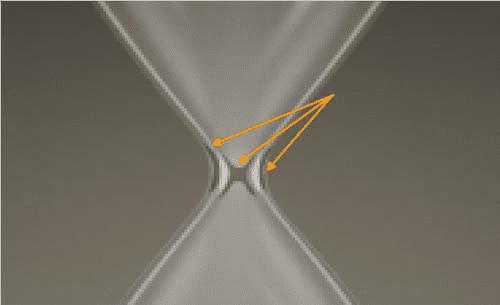
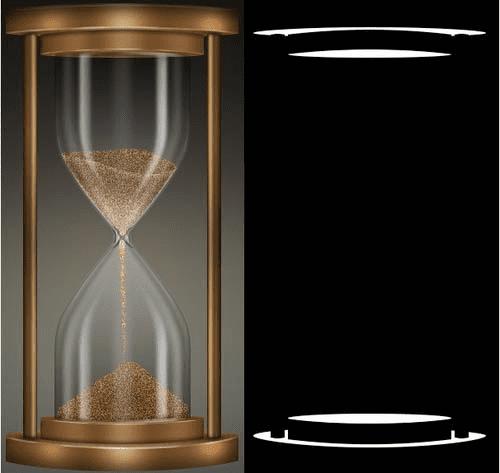
58、下一步,我们将创建沙漏中的沙子。“Sand” 图层组。但在创建“沙”之前,让我们来看看结构。沙将包括如下面的分解图四种基本形态。
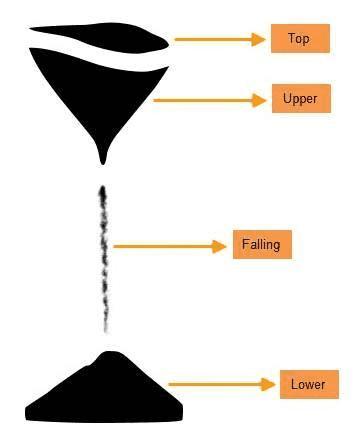
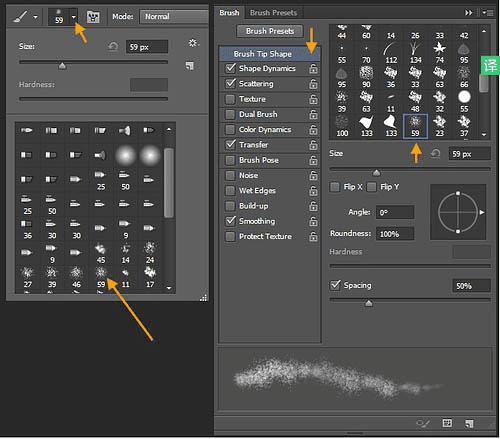
59、顶部,上下沙的形状用钢笔工具创建的。然后是落下的砂砾,用画笔,画笔设置如下图。
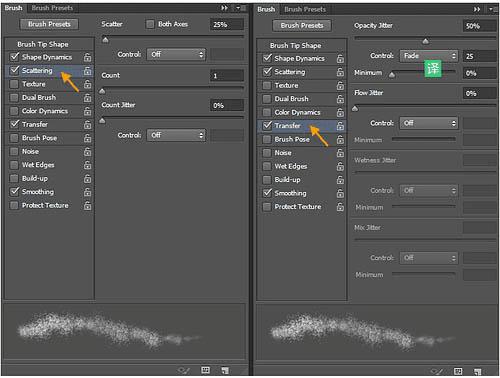
散布:
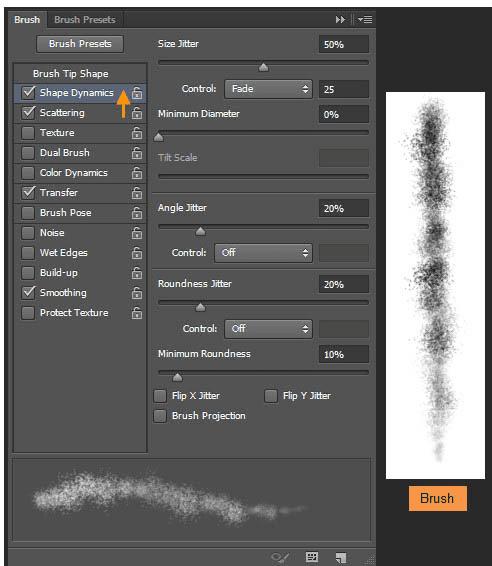
形状动态:
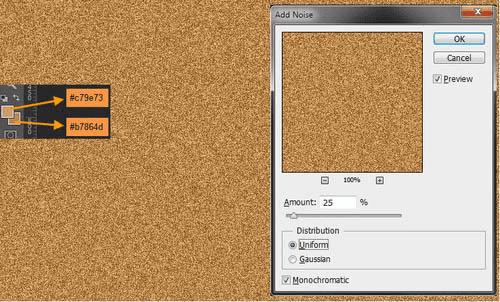
60、在“沙”组里创建沙子的顶部,也就是上部和下部由三个用钢笔工具形状的层。创建一个新图层名为“Sand lower”。前景色和背景色为#c79e73和#b7864d。现在填入的“Sand lower” 层和#b7864d颜色。然后滤镜>杂色>添加杂色。输入25%值,如图设置,然后重命名为 “Sand falling”, “Sand upper” and “Sand top”。
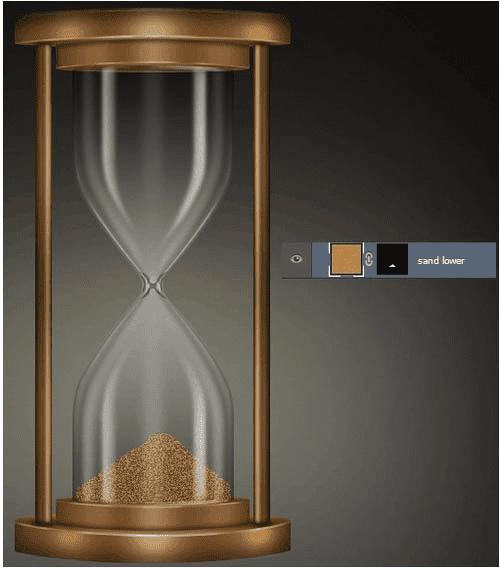
61、按住CTRL键单击沙下部形状图层,添加图层蒙版。
62、“Sand upper” 和 “Sand top”添加蒙版,相同的做法。关闭“Sand falling”。下一步,我们将给 “Sand falling”添加蒙版。
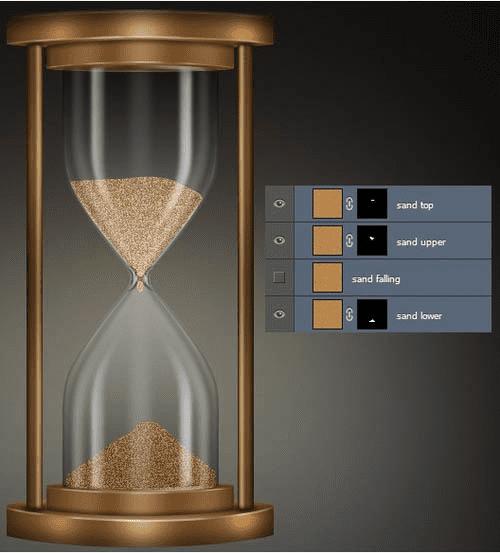
63、“Sand falling”层,图层>图层蒙版>隐藏全部。这将创建一个黑色蒙版。现在的“Sand falling”层完全隐藏。

64、选择飞溅笔刷和白色的刷色。然后在蒙版内,露出的沙子质地。

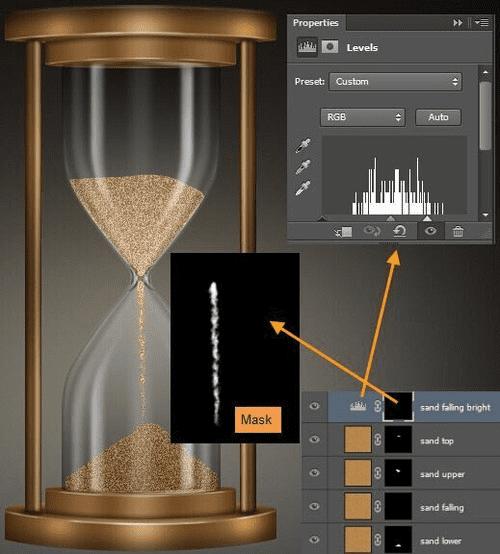
65、下一步,我们将添加一个色阶调整层提亮“Sand falling”。 首先在“沙落”图层蒙版缩略图按住CTRL键单击。这将加载“Sand falling”图层蒙版作为选择。去图层>新建调整图层>色阶。水平调整层将创建该选区的蒙版。重命名级别调整层“sand falling bright”。
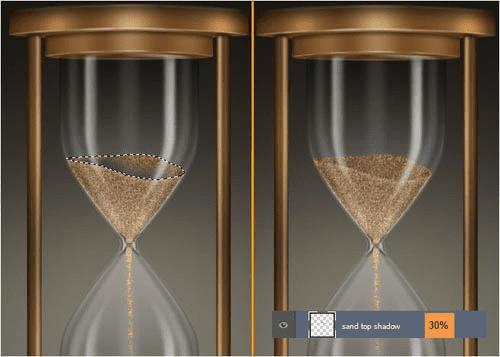
66、在“Sand top”图层的蒙版缩略图CTRL单击加载,作为一个选择。创建顶部名为 “Sand top shadow”新层。选择柔画笔,用50%不透明度,颜色#463f3c。画一些影子在沙滩上的顶部。然后降低图层不透明度为30% 。
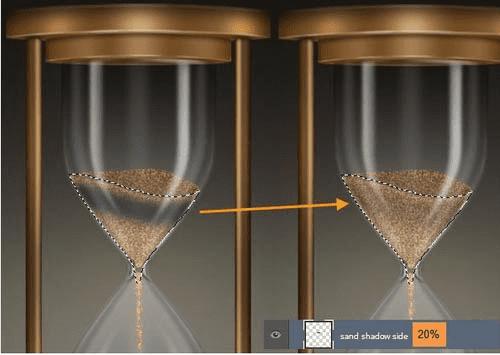
67、在“Sand upper”图层的蒙版缩略图下CTRL单击加载,作为一个选区。创建顶部名为“Sand shadow side”的新层。使用相同的笔刷画一些影子。然后降低图层不透明度为20%。
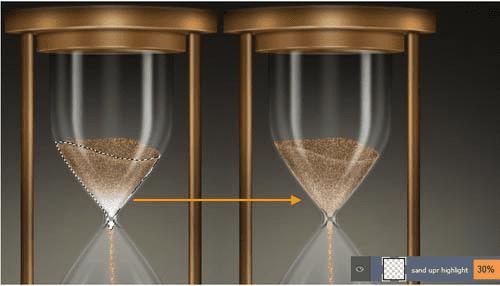
68、在“Sand upr highlight”上面创建新建一个图层。拿软毛刷为50%不透明度和白色的颜色。画一些亮点在砂上部区域的下部。
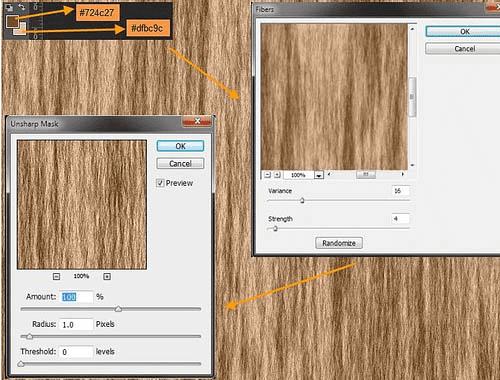
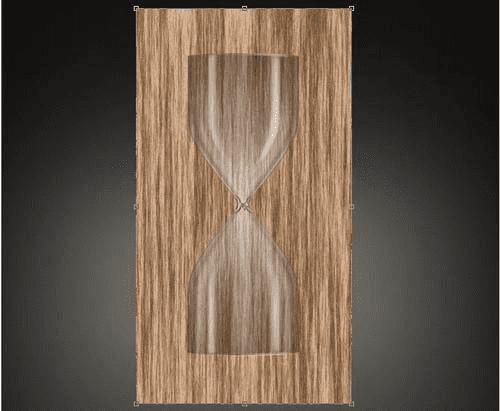
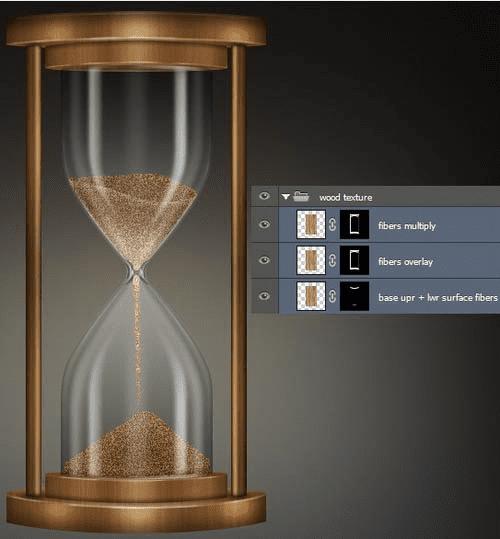
69、下一步,我们将创建沙漏的木材纹理。创建一个名为“木材纹理”在“沙”之上的新图层组。 创建该组内一个名为“Base upr + lwr surface fibers” 的新层。更改前景色和背景色为#724c27和#dfbc9c。然后填充#dfbc9c色层。滤镜>渲染>纤维,用16和4。滤镜>锐化> USM锐化,并使用100,1.0和0半径和阈值。
70、调整“Base upr + lwr surface fibers”层,编辑>变换>缩放。复制这一层并重新命名为“Fibers overlay”。
71、选择上下两个基地,如图,选出选区。
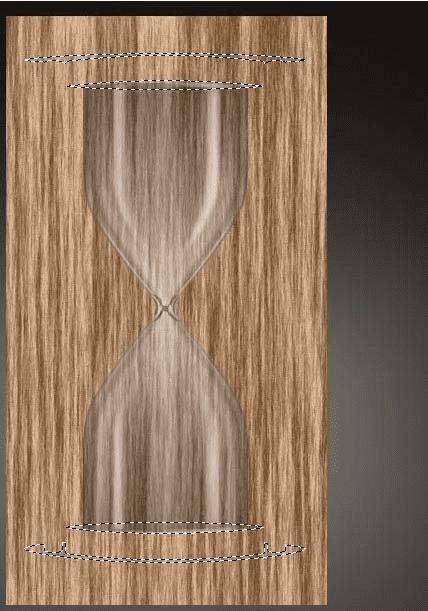
72、然后回到“Base upr + lwr surface fibers”图层,添加图层蒙版吧。该层的不透明度改为10%。
73、下一步创建“Base upr + lwr” CTRL-click on “Base upr large surface”的纹理。选出选区,回到“纤维叠加”图层,添加图层蒙版。这层的图层不透明度改为10%,混合模式为叠加。
74、重复的“纤维叠加”图层,并重新命名为“纤维正片叠底”。改变混合模式为正片叠底,不透明度为10%。
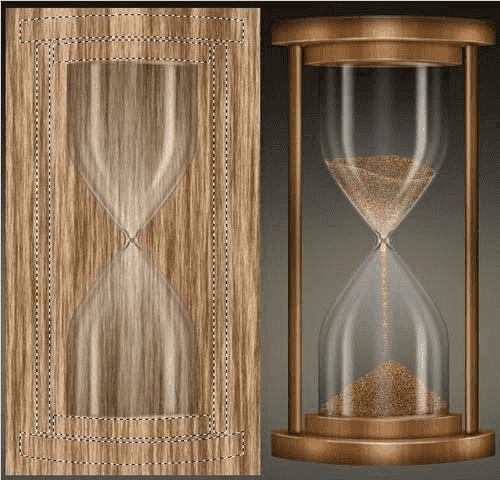
75、新建图层,然后可用钢笔画出。用黑色填充颜色的选择。复制这一层并重新命名为“Base shadow contact”。 然后,针对 “Base shadow area”,滤镜>模糊>高斯模糊,然后键入3px,然后点击确定。接着滤镜>模糊>动感模糊,然后键入100像素的距离和角度0度。
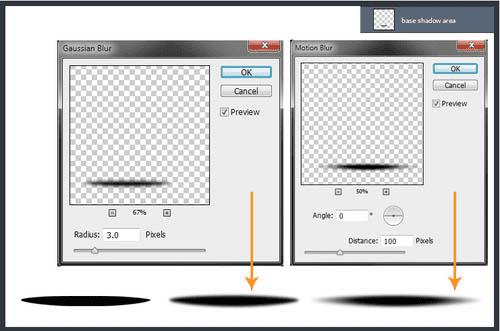
76、然后,下面的“Base shadow contact”层,滤镜>模糊>高斯模糊,然后输入2个像素,然后点击确定。

然后向下移动一点,完成最终效果。

本文地址:
http://www.45fan.com/dnjc/22296.html