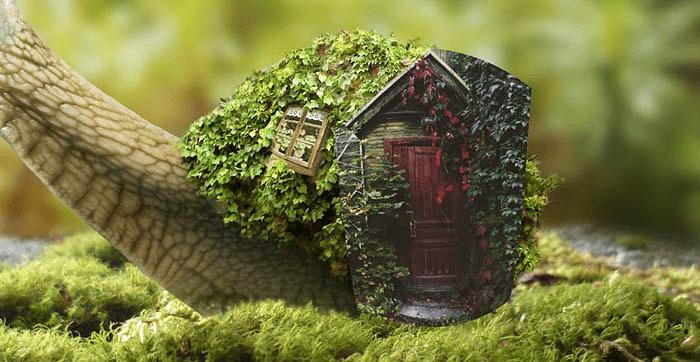
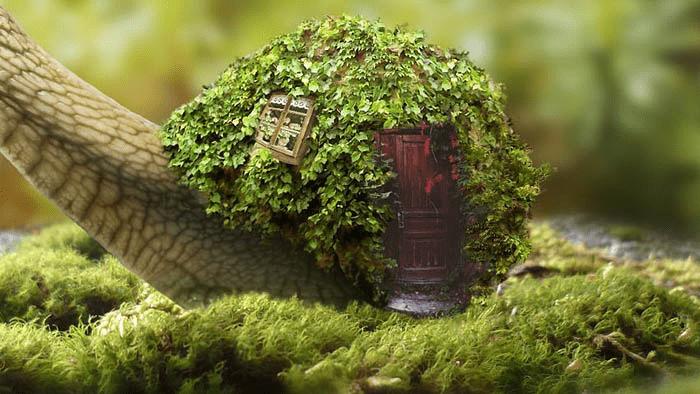
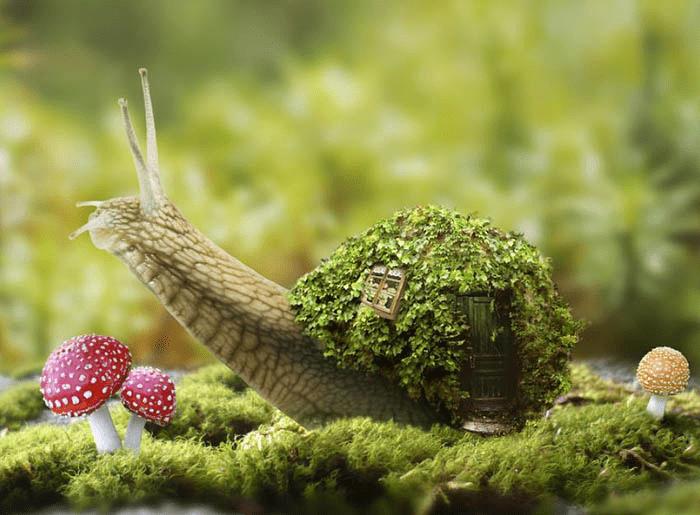
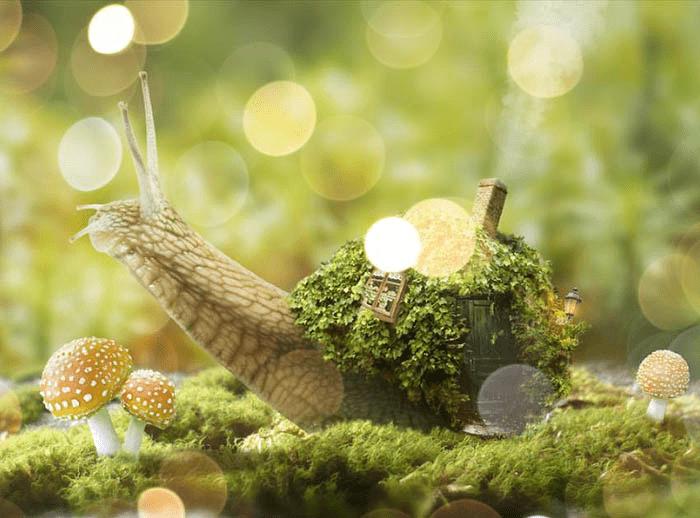
最终效果

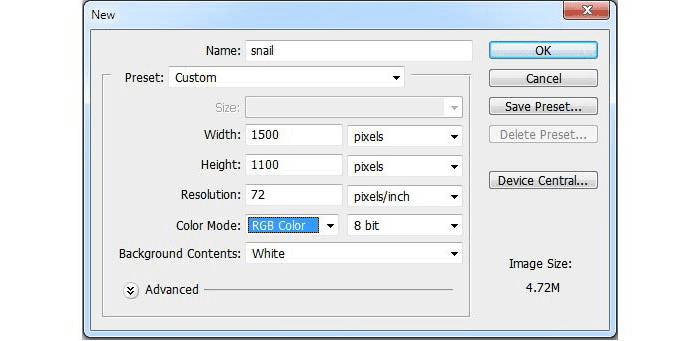
一、建立基本场景 1、在Photoshop创建如下图所示的画布,设置长宽为1500*1100像素
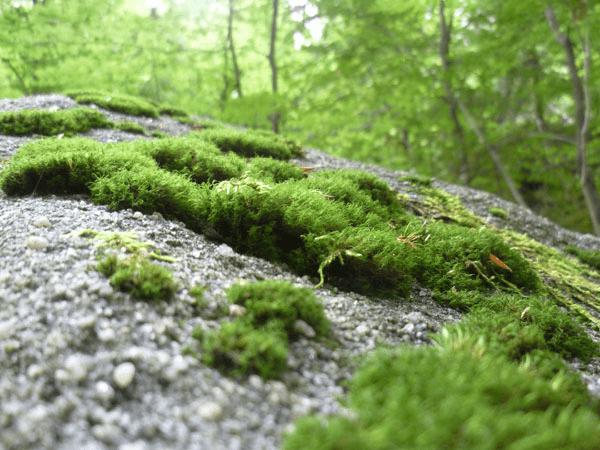
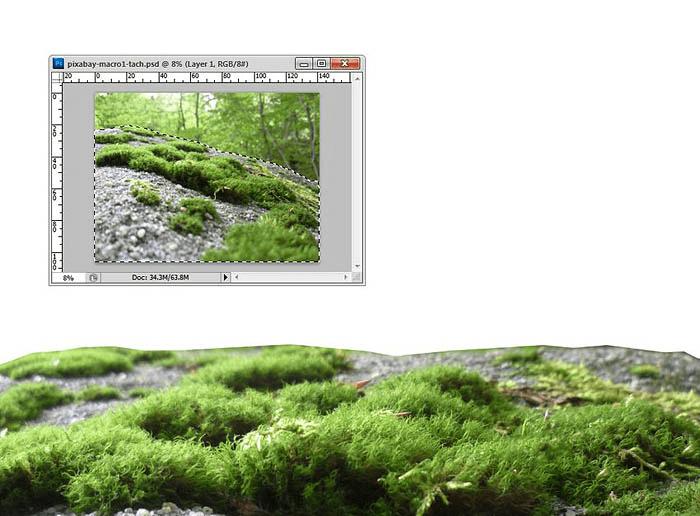
2、打开前景素材,选择多边形套索工具,如下图将前景物选择创建选区,然后用移动工具将前景移放到画布的下半部。按Ctrl+T调出自由变换工具,调整角度形成水平放置的效果。
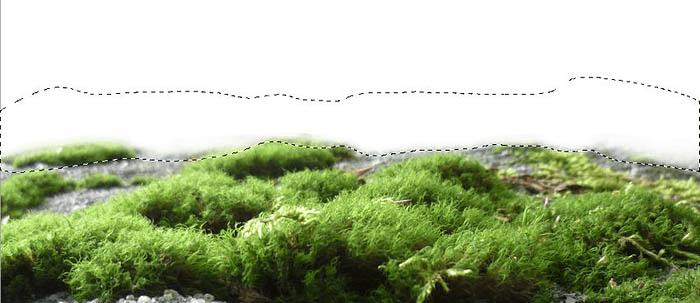
3、对前景图层添加图层蒙版,选用软黑笔刷,将边缘软化,让前景边缘融合在白色背景中。
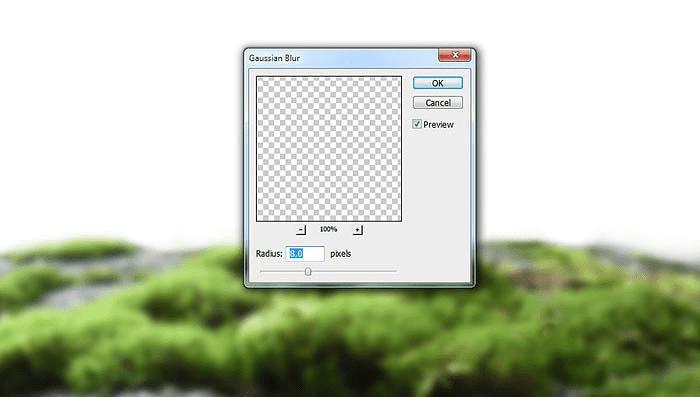
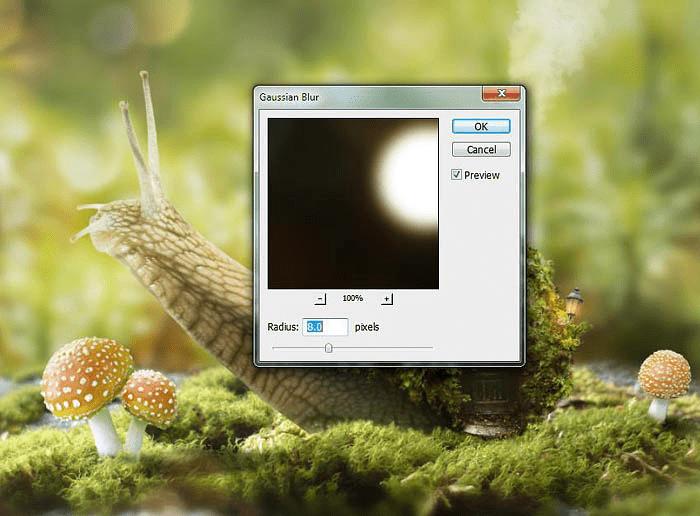
4、选择“滤镜>模糊>高斯模糊”,设置半径为8像素。
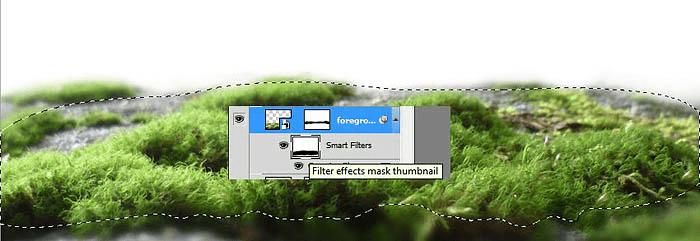
在滤镜的蒙版上,选用软黑笔刷将前景中间的模糊效果去掉。
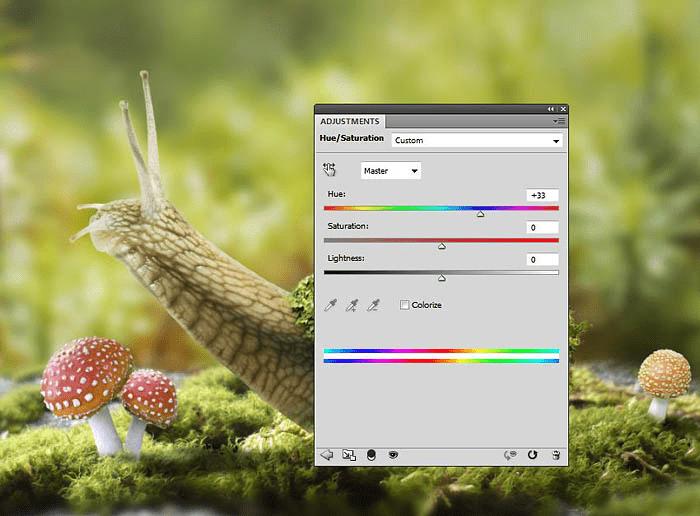
5、选择“图层>新调整图层>色相/饱和度”,设置调整图层为剪贴蒙版,设置色相值为-17。

6、将背景素材打开,用移动工具将背景移动到主画布中,设置于前景图层后面。
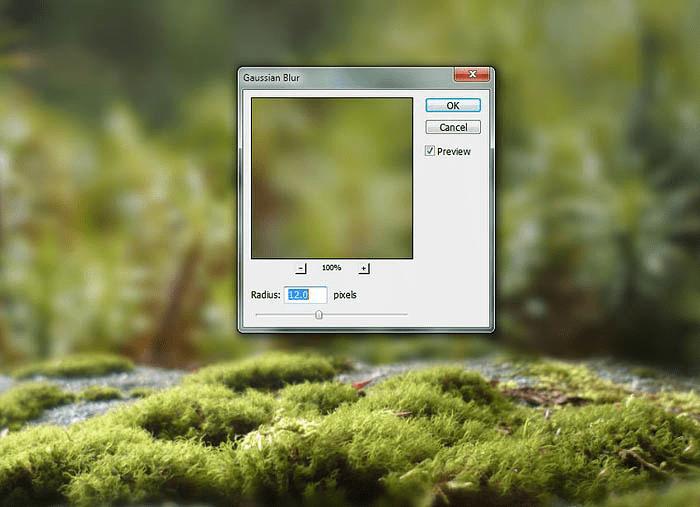
7、相对于前景,背景位于后方,会更显模糊。对背景图层应用高斯模糊滤镜,设置模糊半径为12像素,这样就能复核景深逐渐变化的规律。
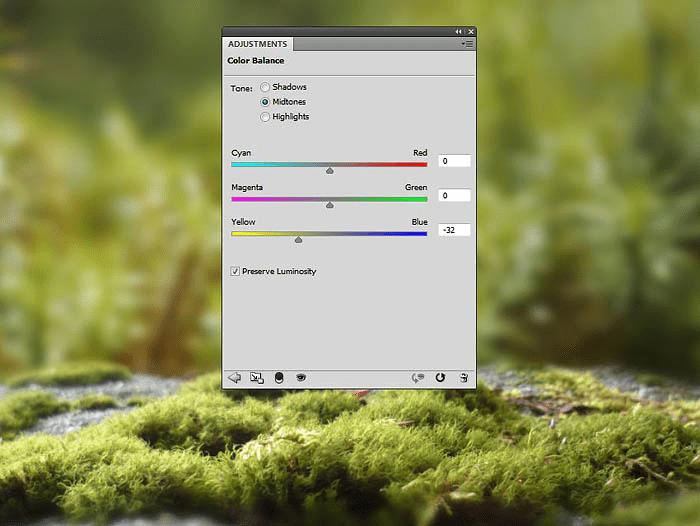
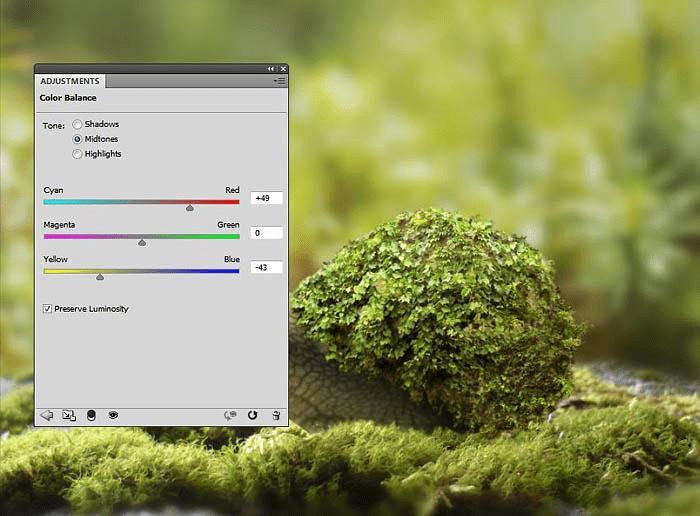
8、创建色彩平衡调整图层,设置黄色中间色调为-32,这样背景的颜色就能与前景色搭配起来。
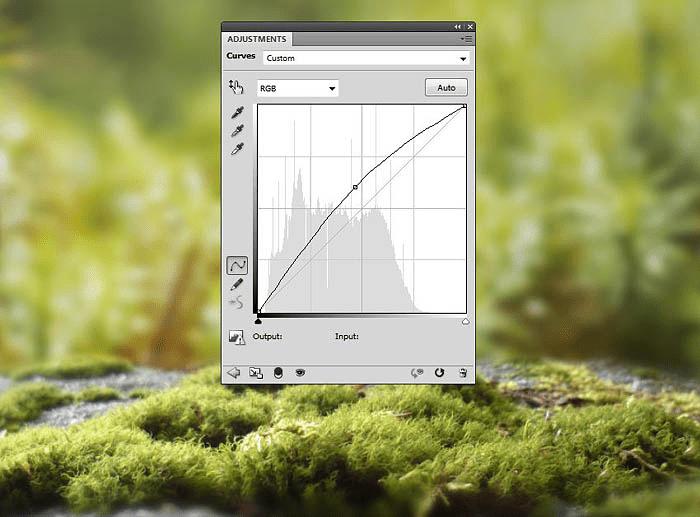
9、添加曲线调整图层,将背景调得更亮。
二、添加蜗牛
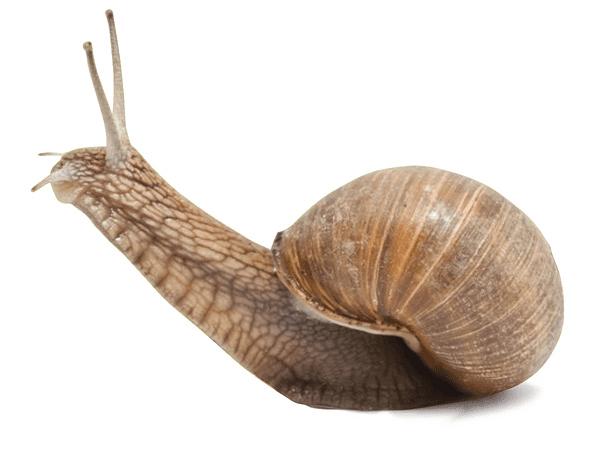
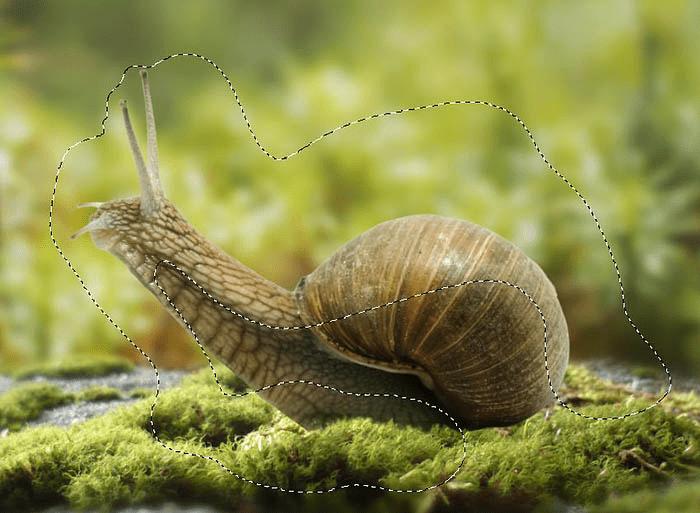
1、选择用魔棒工具,将蜗牛从素材中抠出,然后放置在画布中央。注意不是模糊区域。
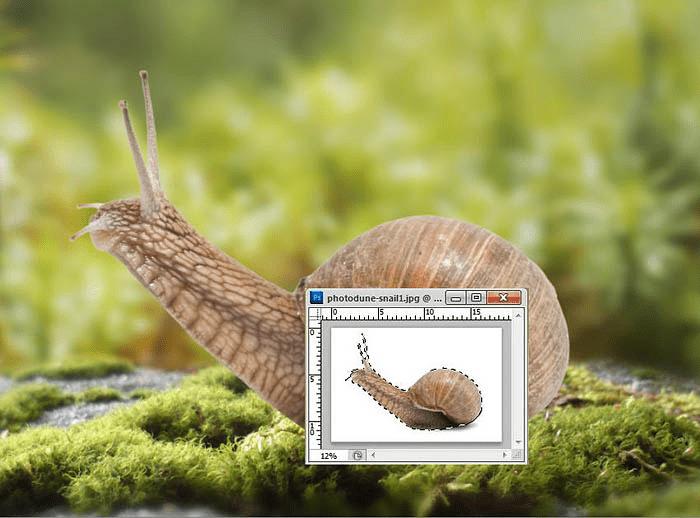
对蜗牛图层添加图层蒙版,然后选用直径约3-4像素的中硬度画笔,将蜗牛底下部分遮蔽,融合在苔藓场景中。
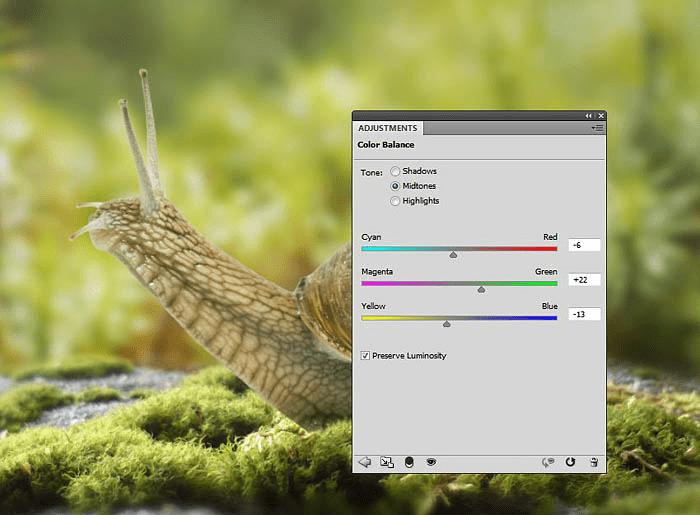
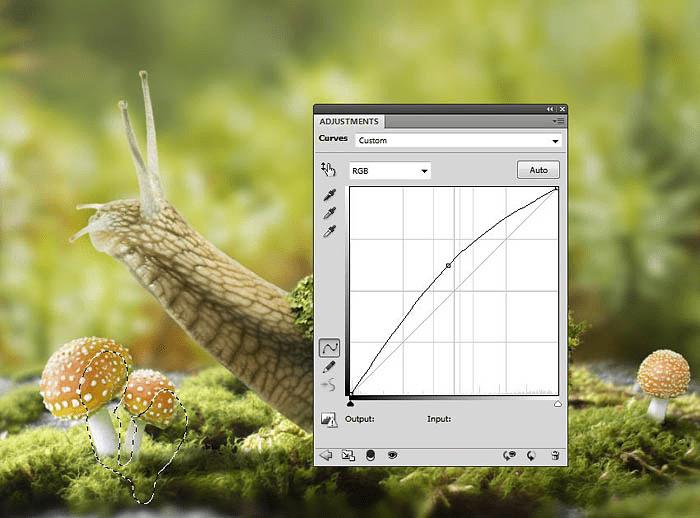
2、对蜗牛图层添加色彩平衡调整图层,中间调如下图设置。
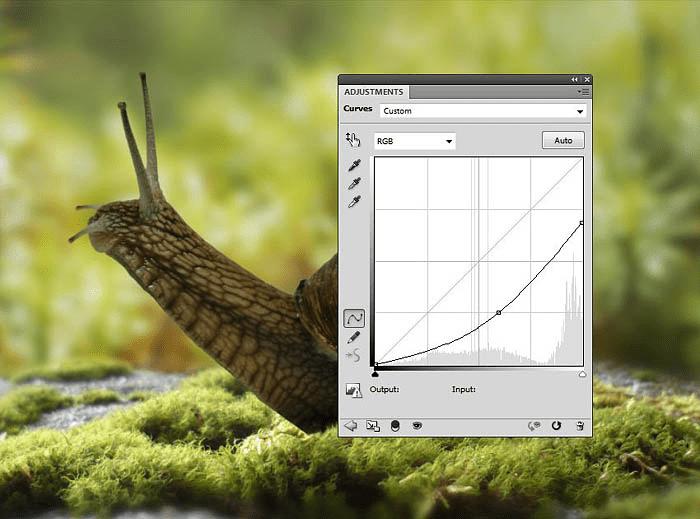
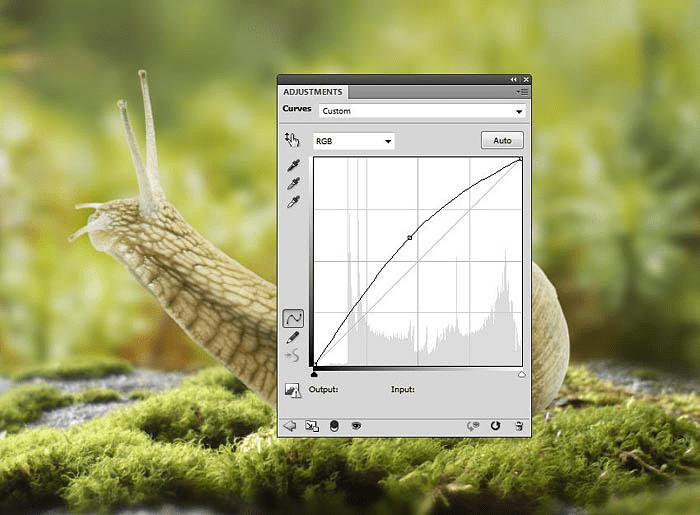
3、从背景中可以看到画面的光线方向是从左到右的,所以在蜗牛背光部分会相对暗一点。添加曲线调整图层,降低亮度,然后在调整图层蒙版中用黑色软笔刷,将向光部分的调节效果遮蔽。
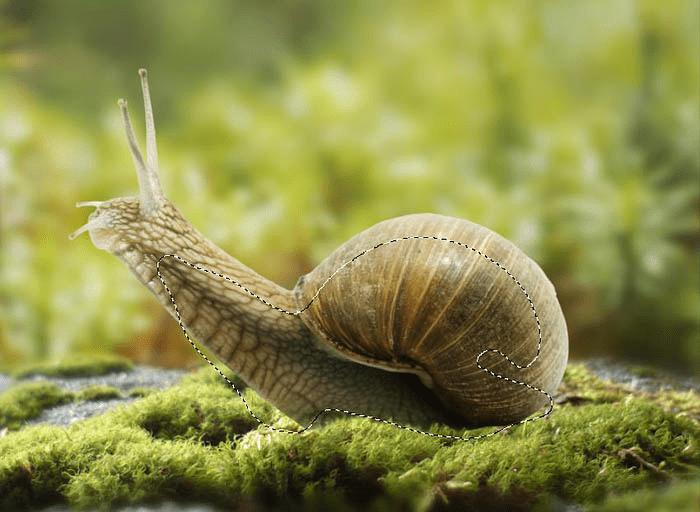
4、另外添加一个曲线调整图层,将蜗牛的前面部分调亮。同时在调整图层蒙版上将暗部遮蔽,这样调整效果就不会影响到暗部。
三、添加常春藤 1、将常春藤素材打开,然后选用多边形套索工具将其中一部分抠出,贴到蜗牛壳上。
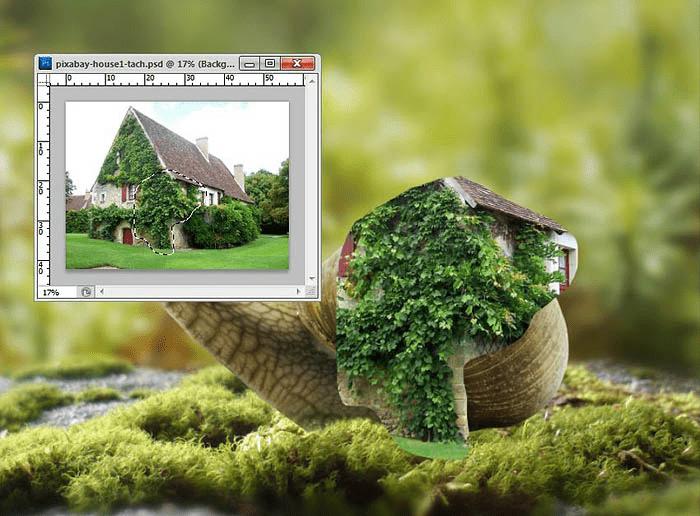
选用画笔工具,重置将画笔设置为默认值,选择24像素的飞溅画笔,在图层蒙版中,将常春藤中不想要的部分擦走并且形成锯齿边缘,这样更加贴近常春藤的形状。
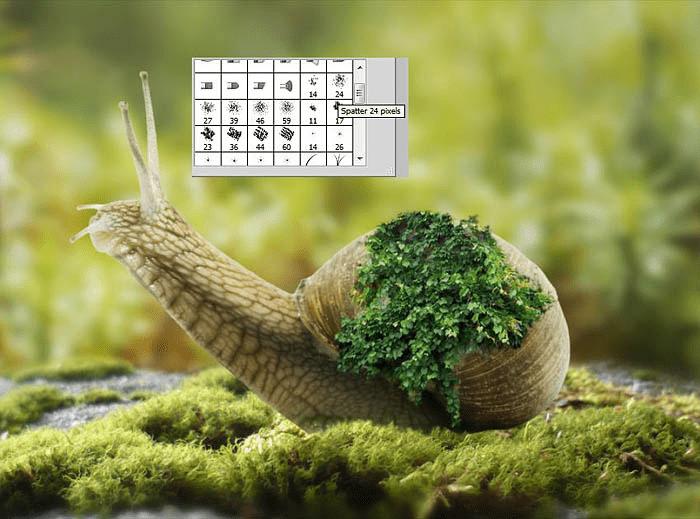
2、利用相同的办法,将其他常春藤添加到蜗牛壳上。
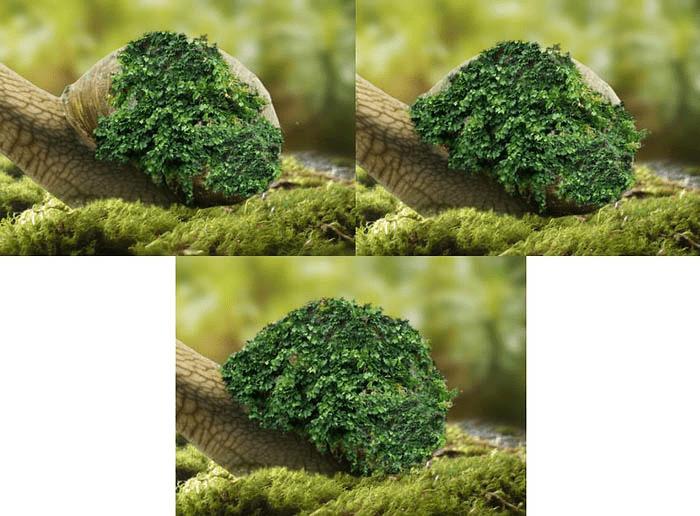
3、选择上全部的常春藤图层,然后按Ctrl+G归入图层组中,设置图层组混合模式为正常、不透明度为100%。添加曲线调整图层,将常春藤的亮度调高,然后用过蒙版将下部常春藤的调整效果遮蔽。
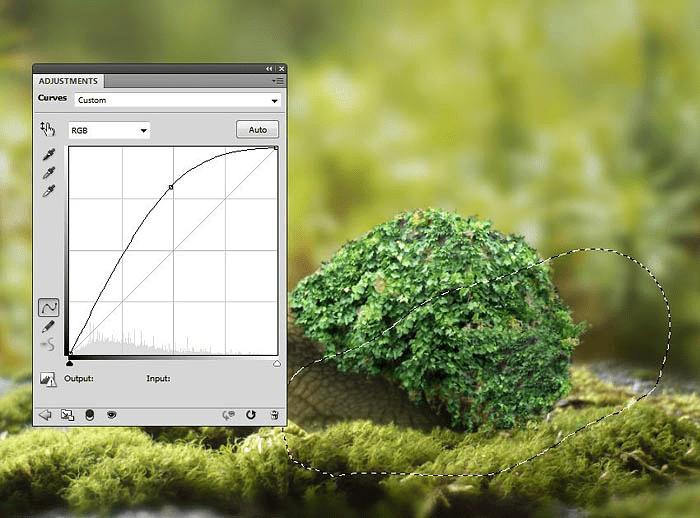
4、再添加曲线调整图层,增加暗部的阴影效果。同时通过蒙版将上部部分的调整效果遮蔽。

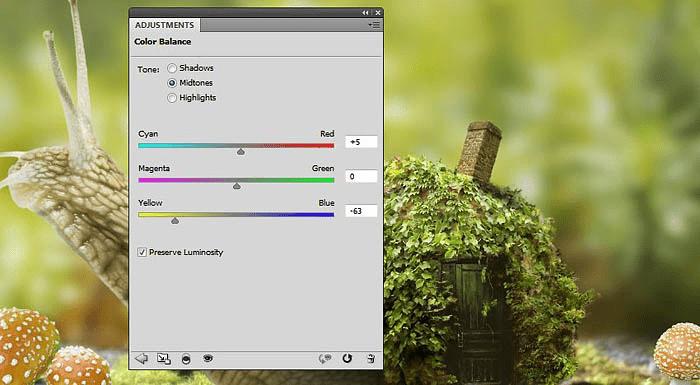
5、添加色彩平衡调整图层,将常春藤的颜色调整到与背景蜗牛的色调差不多。
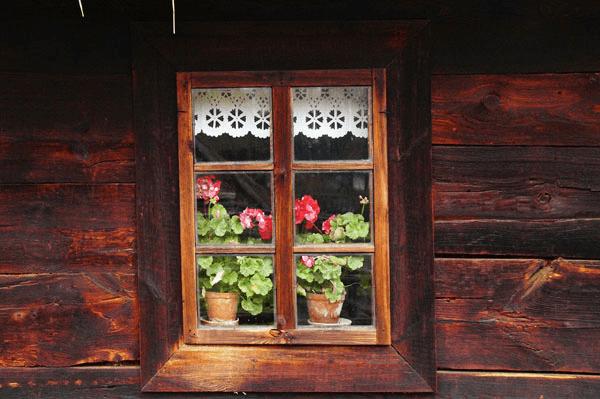
四、添加窗户
1、添加窗户素材,然后选用矩形选框工具,将窗口选择起来,然后放置在蜗牛壳上的常春藤的左上方。按Ctrl+T调出自由变换工具,适当调整角度和扭曲效果,以适应蜗牛壳的轮廓。
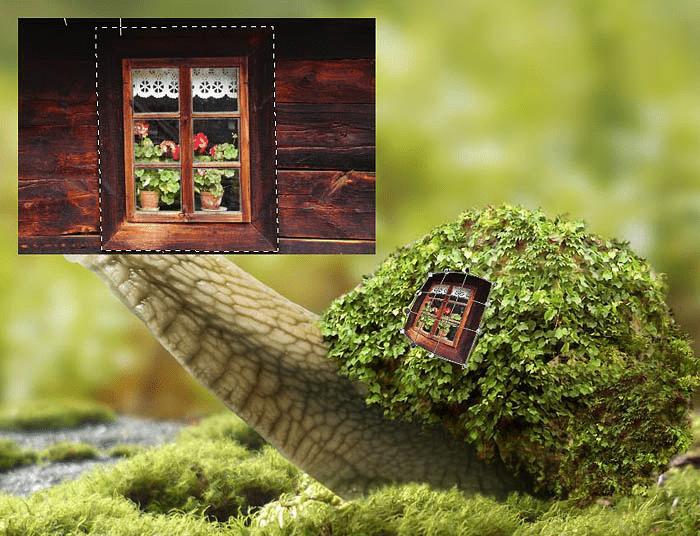
2、对窗户图层添加图层蒙版,然后选择24像素的飞溅画笔,将窗户边缘的常春藤给显示出来。

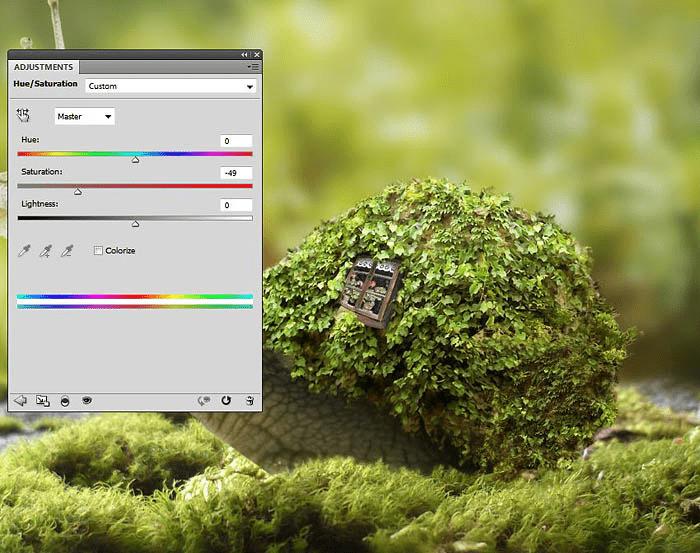
3、添加色相/饱和度调整图层,设置饱和度为-49。
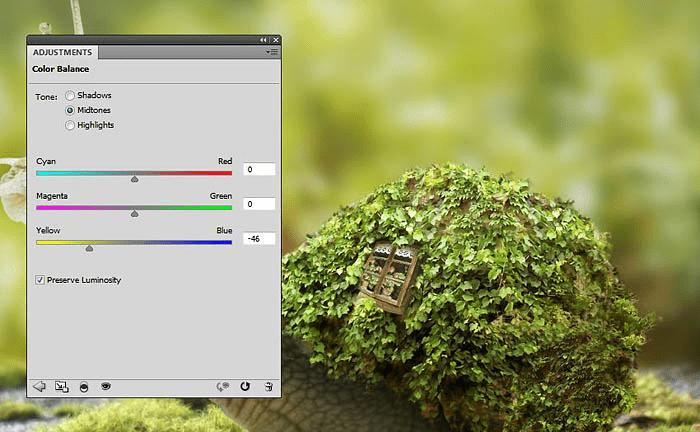
4、添加色彩平衡调整图层,设置黄色中间调为-46。
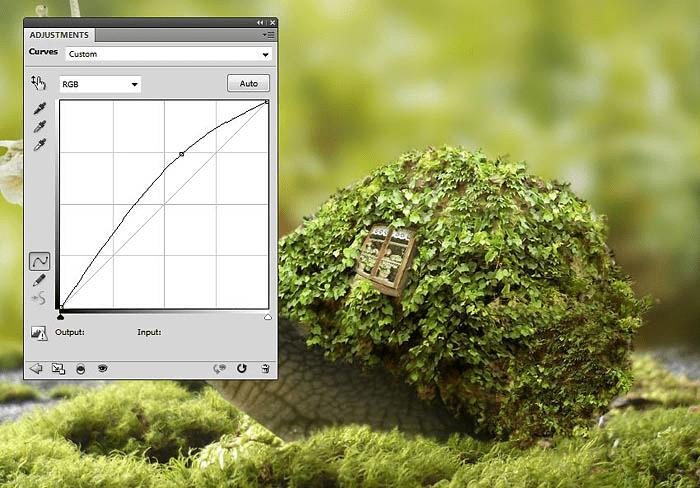
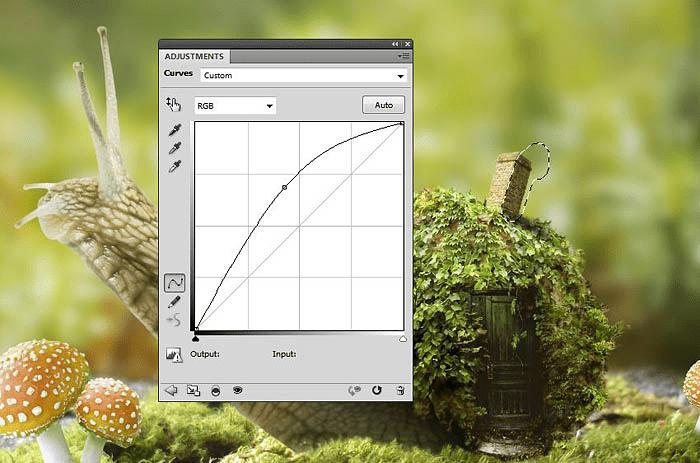
5、再添加曲线调整图层将窗户的颜色调亮一点。
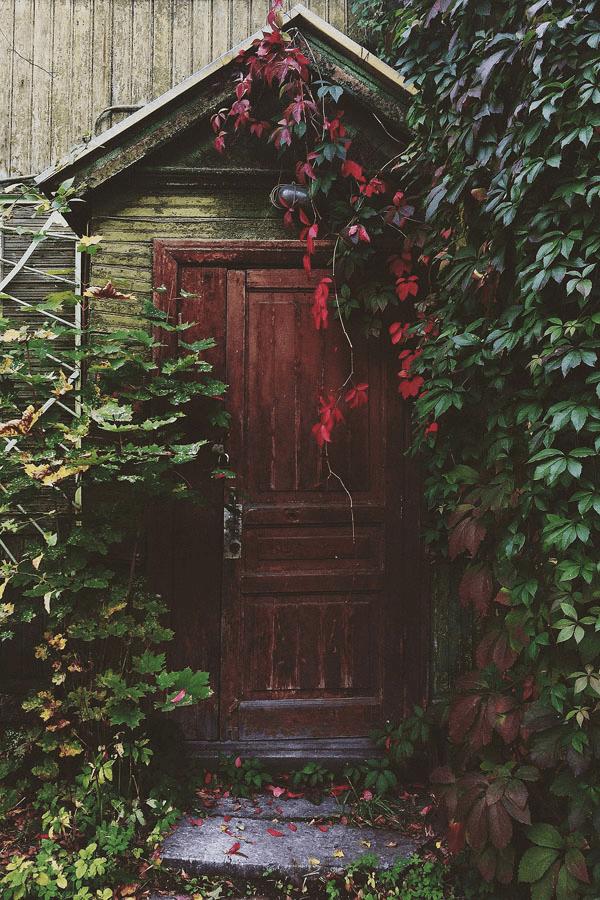
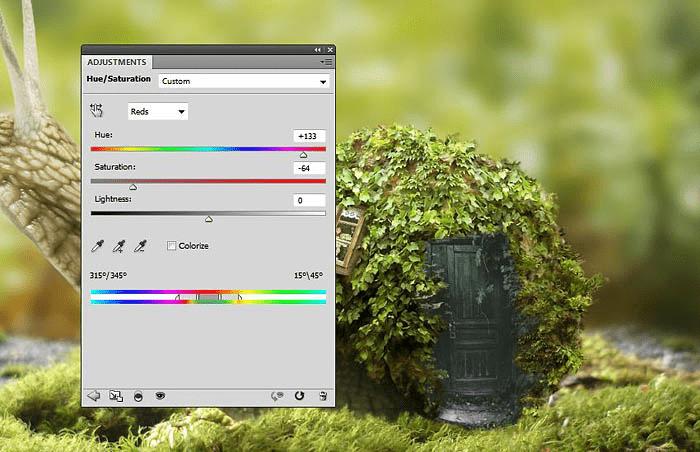
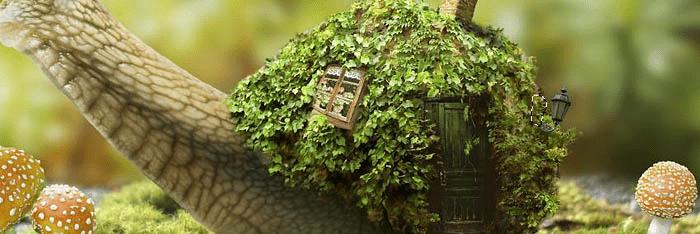
五、增加房门 1、打开房门素材,然后将房门添加到蜗牛壳右下角上。
继续选择24像素飞溅画笔,在图层蒙版上将常春藤给显示出来,让房门融入到场景中。
2、创建色相/饱和度调整图层,设置红色的设置值如下。
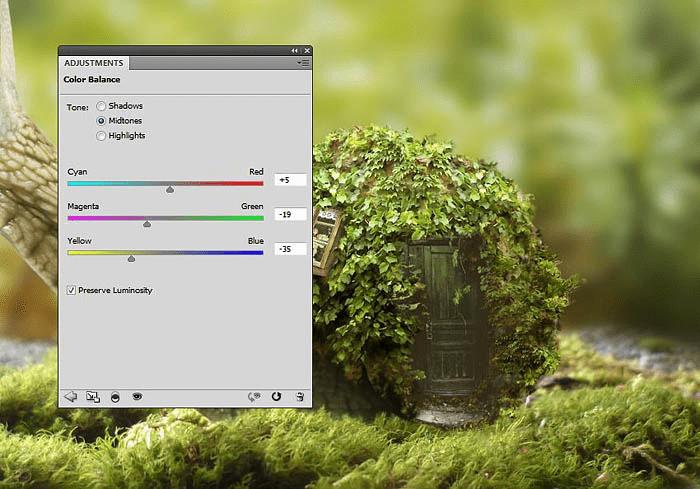
3、添加色彩平衡调整图层,调整中间调如下。
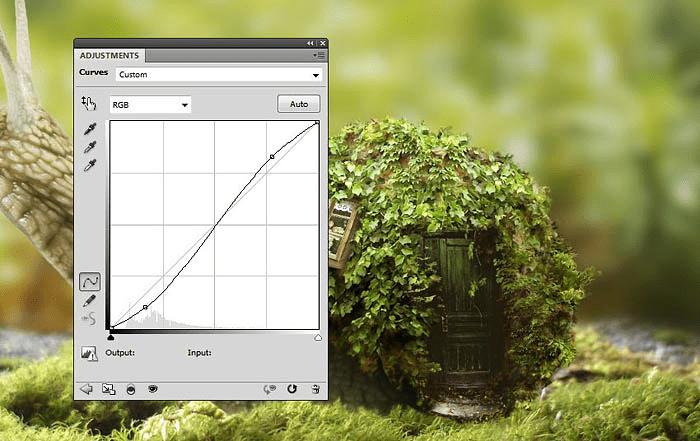
4、再添加曲线调整图层以增加房门的对比度。
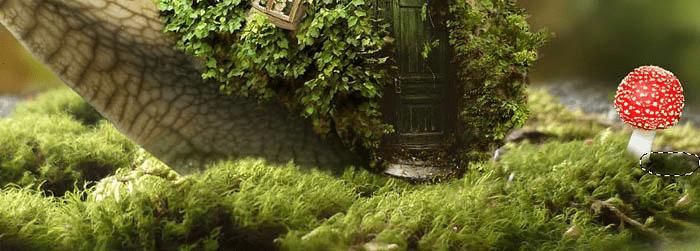
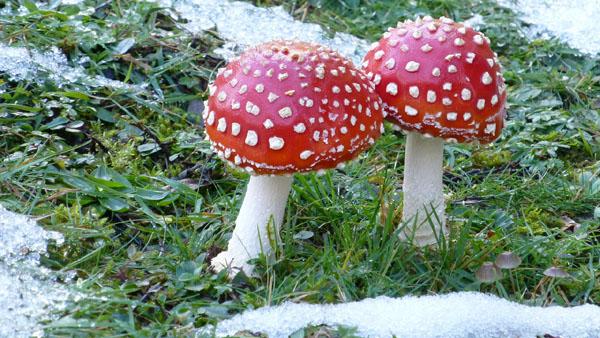
六、添加蘑菇 1、将素材蘑菇1从背景抠出,然后放置在场景的右上角,蜗牛的后面。

对蘑菇1图层添加图层蒙版,然后用黑色画笔将蘑菇的底部遮蔽掉,让蘑菇融入背景中。

2、在蘑菇1图层下面创建新图层,选择黑色中硬度笔画在蘑菇的后面画上阴影,设置不透明大约为50%。这是考虑光的照射方向是从左往右。
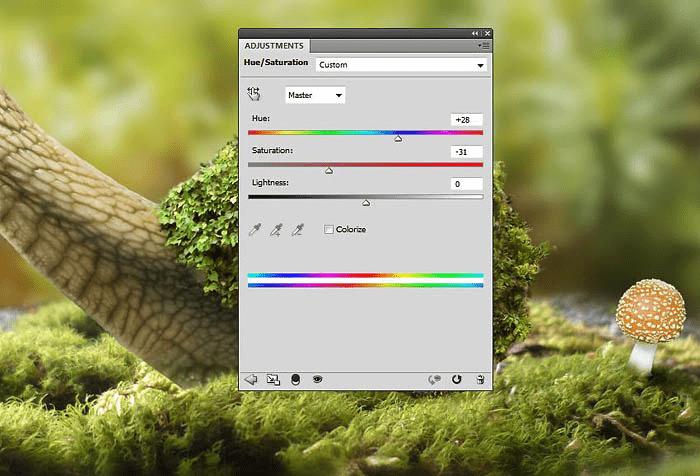
3、对蘑菇图层添加色相/饱和度调整图层,设置如下。
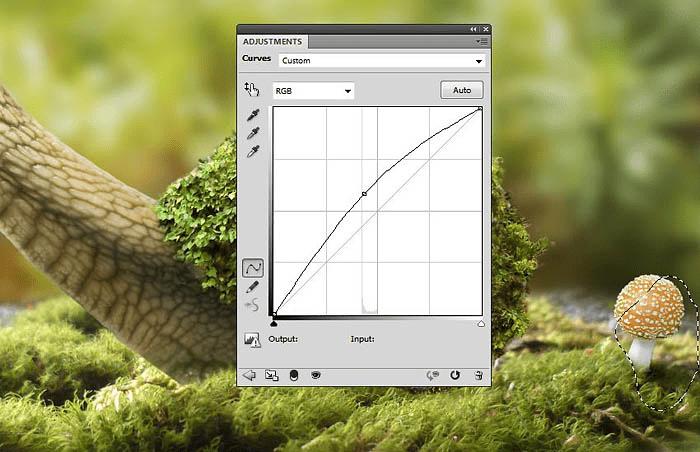
4、创建曲线调整图层,如下图设置曲线,让蘑菇右边变暗,符合光线规律。通过蒙版调整调整范围,让左边不受影响。

5、添加另外的曲线调整图层,这次增加蘑菇左边的亮度。然后用蒙版遮蔽右边,这样蘑菇左右就会有明显的明暗变化了。
6、在画布的左边添加蘑菇2素材,用图层蒙版将底部遮蔽,与苔藓融为一体。
7、跟蘑菇1素材一样的操作,按光线方向调整蘑菇的光暗效果。
8、对蘑菇2添加色相/饱和度调整图层,设置如下。
9、添加色彩平衡调整图层,设置如下。

10、添加曲线调整图层,只对左上角调亮,右下角遮蔽调整效果(利用蒙版)。
七、添加烟囱和炊烟 1、将烟囱从素材中抠出人,然后放到蜗牛壳顶上中间的位置。


2、在烟囱图层下添加图层,绘画出阴影效果,就如前面一样。

3、添加色彩平衡调整图层,将烟囱设置为红黄调的。
4、添加曲线图层,调亮烟囱的左侧,遮蔽右侧调整效果。
5、将炊烟从素材中移到画布中,然后调整好角度。
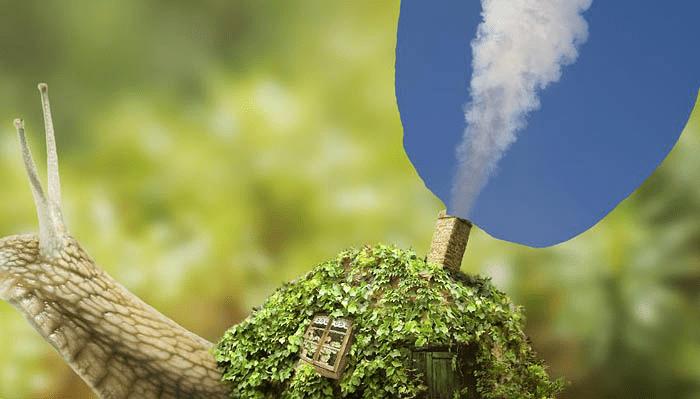
调整炊烟图层的混合模式为滤色,然后用蒙版和画笔将边缘隐藏起来。
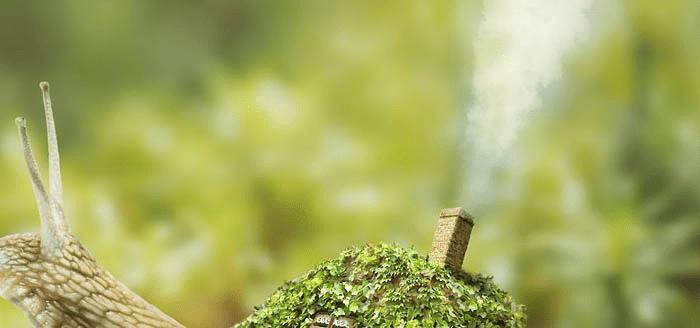
6、添加色相/饱和度调整图层,降低饱和度至-100。

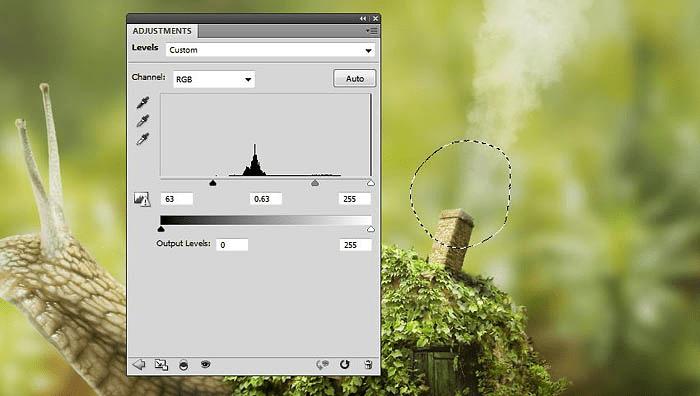
7、添加色阶调整图层,让炊烟底部更加明显,顶部越显稀疏。
八、添加灯火 1、将路灯素材的右边抠出,放在蜗牛壳的后面。


利用图层蒙版将路灯融入场景,就像隐藏在常春藤中。
2、添加曲线调整图层,将路灯调亮。
3、创建色彩平衡调整图层,然后设置中间调如下。
4、添加新图层,然后选用软笔刷,设置颜色为#2a1b01。画在路灯和周边的常春藤上。设置图层混合模式为线性减淡100%。
5、添加新图层,然后用颜色#fbd796为路灯点缀更亮的光芒,设置混合模式为叠加。
九、添加虚化背景 1、将虚化背景导入到画布汇总,设置混合模式为滤色。

利用图层蒙版将蜗牛、蘑菇上的虚景消掉。
2、添加高斯模糊滤镜,设置半径为8像素。让场景效果更加朦胧。
十、整体调整
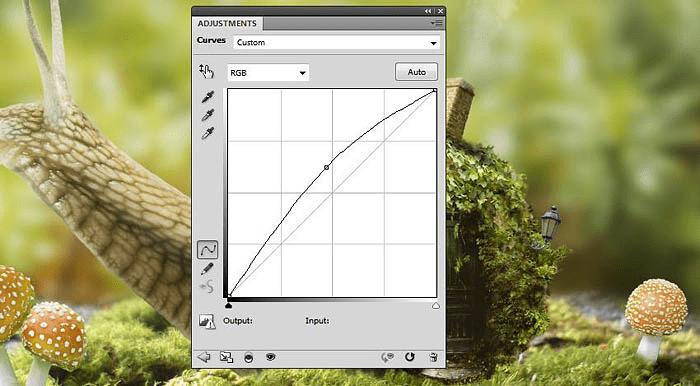
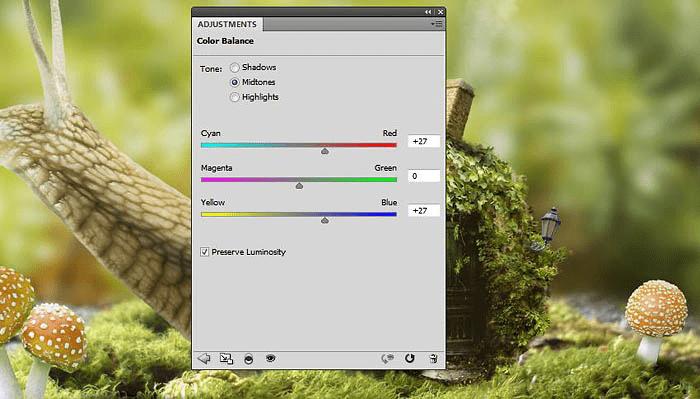
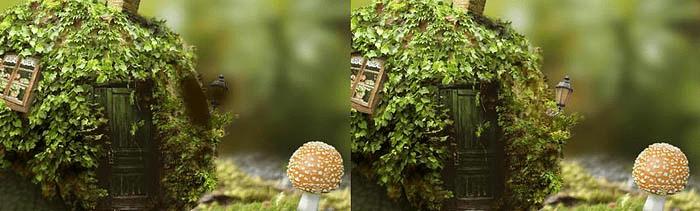
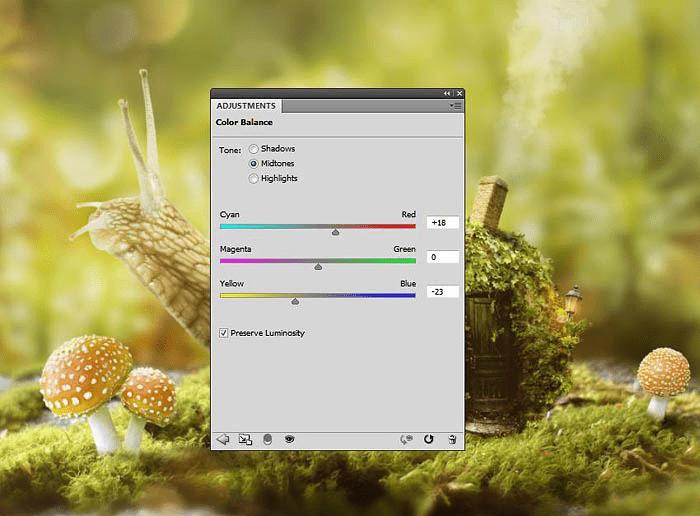
1、在图层面板顶端添加色彩平衡调整图层,设置中间调如下。
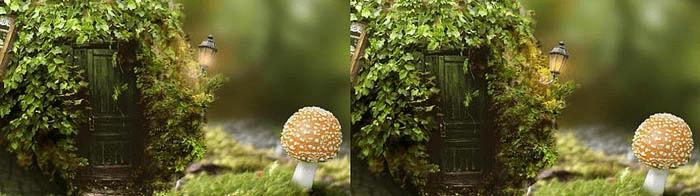
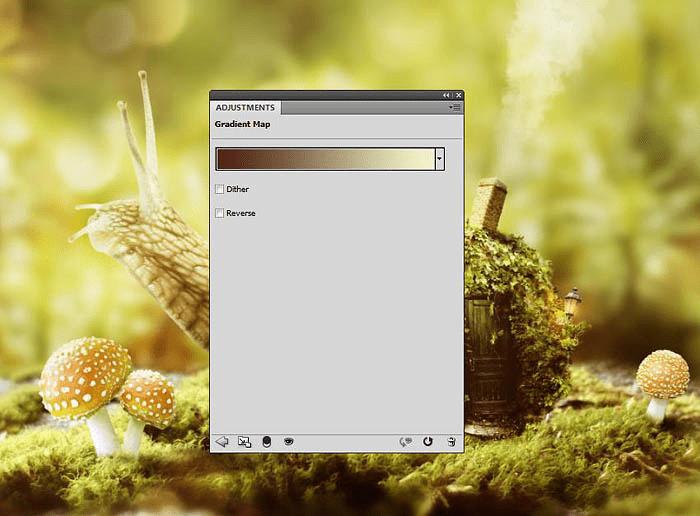
2、添加渐变映射调整图层,选择渐变颜色为#512114到#f6fbcb。设置混合模式为柔光。
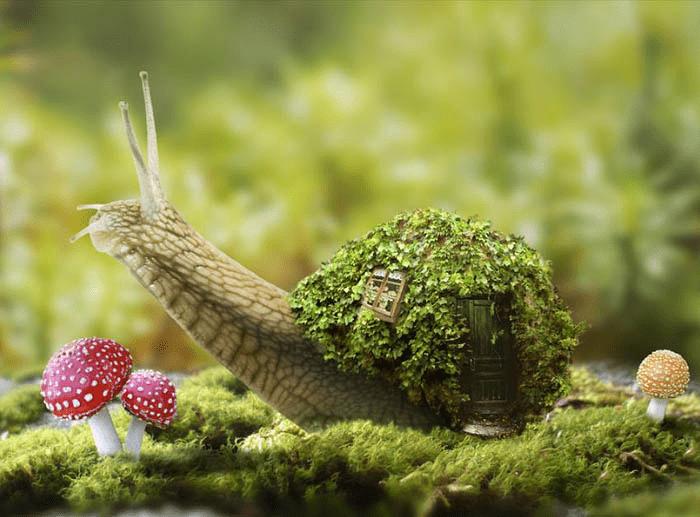
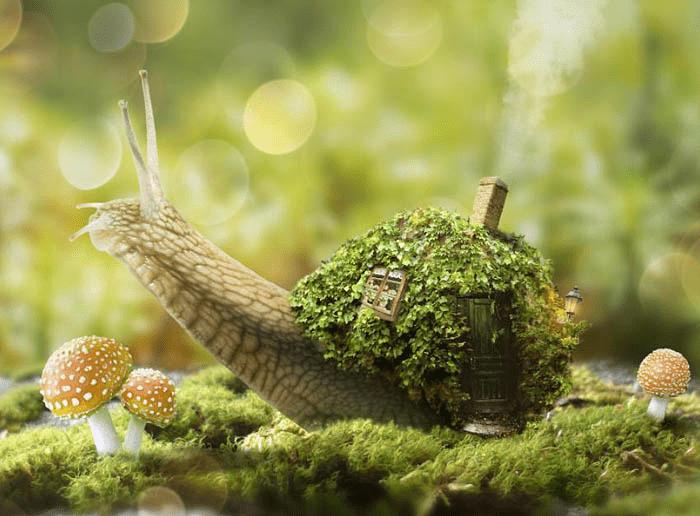
最终效果:
本文地址:http://www.45fan.com/dnjc/82676.html